
This post was submitted as part of the March “Families, Create!” Carnival, hosted by Mandy at Living Peacefully with Children and Dionna at Code Name: Mama.
 The theme for "Families, Create!" this month is Animals! I actually did a few animal crafts this month but somehow have lost the pictures for the first couple. Let's assume they're moldering on the external hard drive, but since I have just one hour to go before it's not March here anymore (cough…procrastination…snort), I'm going with what I have on my laptop.
Which is…activity bags!
Kristin of Intrepid Murmurings posted on Natural Parents Network about "Toddler and Preschooler Activity Bag Fun!"
"The main idea is that you assemble or make a self-contained activity that fits into a small bag. When you need a quick (or long) activity to occupy your bored or busy kid, you bust it out! Some are great for on-the-go, airplane or car rides, at the doctor’s office, etc, while others are a bit more messy and best for home. These can also work great for homeschoolers — and you can obviously cater the contents to any age, topic and ability level."
I loved this idea for ways to amuse Mikko when the new baby's here and I can't always be as active and hands-on as I am now (which, let's face it, is not all that much anyway, but I digress…), or when we're out at restaurants or friends' houses or traveling. The idea wasn't foreign to me, because I actually had collected just such contained activities for our latest trips, but I didn't know they had a name. And that there were so many ideas for them!
Take a look at this list Kristin later posted on her blog to see: "Idea List for Toddler & Preschooler Activity Bags."
So I posted this hint-hint comment on my Sunday Surf that week:
"…Kristin's ideas look so fun. I need to find some spare time now to make a bunch of these for when the baby's born and Mikko's pinging off the walls! Maybe Kristin wants to get together with me to make some more…hee hee."
Wouldn't you know it — it worked! Kristin organized this huuuge swap with folks from the local attachment parenting group and invited me to participate. Yea!
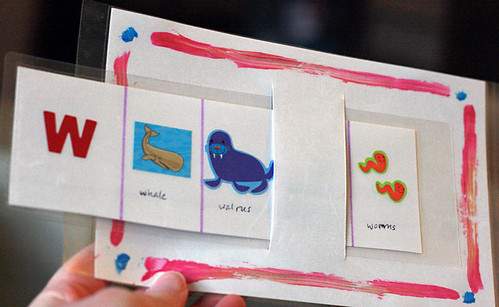
So, our group had 12 people, and I waited till the last second to pick what activity I was going to do (notice a pattern?). It came to me after I picked up Mikko at preschool one day and he very excitedly showed me a game they had worked on when practicing the letter K. It was a smaller piece of paper with 4 K words that threaded through a bigger piece of paper. He had colored it all purple, which he was very proud of. But he was most proud of the fact that when one of the pictures was covered up by the slot in the big sheet of paper, he could remember which one it was. It was a "hide-and-seek game," he told me, clearly thrilled.
Well, who am I to look a gift activity in the mouth?
I knew what I was making for the swap, and I quickly (kind of) gathered my supplies. I'll give you a rundown of the process here so you can make your own!
How does this relate to animals? It does! It does, seriously. Most of the stickers I found were animals. There.
(Oh, my gosh. Photobucket's down for maintenance. Seriously, can't a procrastinating girl get a break? All right, Flickr ahoy.)
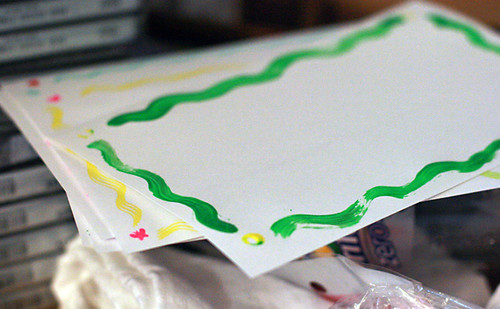
I chose large-size (5" x 7") index cards for the base cards and decorated them with a simple border — some marker (and marker stamps), some paint. I am not very artistic but wanted some pizzazz since I was sharing these, so you can do as you wish with yours — either fancier or plainer.
Mikko was not impressed with my artsy-fartsy borders with the breaks at the corners. "No, Mama, that not right!" He showed me on his paper how to make a proper rectangle — "See, Mama, it connects!"
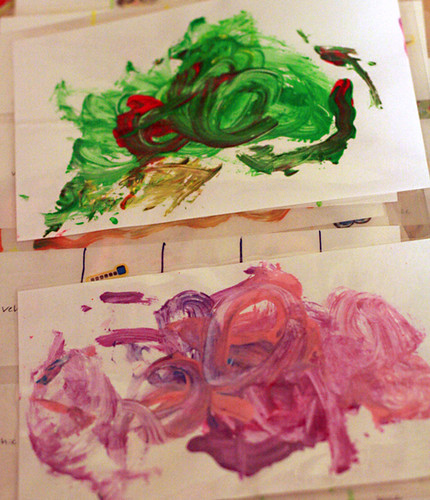
He also did his own cool paintings for some base cards, which I preserved and laminated for our own use.
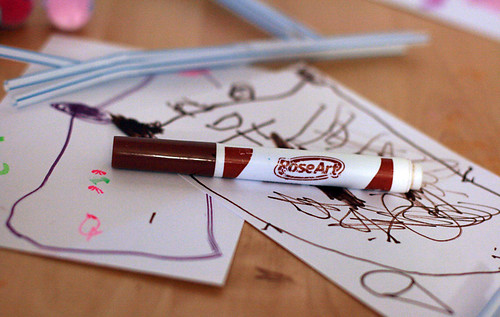
Note: Buy more supplies than you need for your activity bag(s) if you suspect your children will want to "help" you put them together. Mikko helped me the whole way through. Oh, boy, did he ever. He was very helpful. Very, very helpful. So, so, so, so helpful. I'm not being sarcastic. Why would you think I was being sarcastic? It must be that you secretly hate children. You should really work on that.
Ok, I'll continue now.

For the game cards, I cut the index cards in half. I decided to make four cards for each activity bag for the swap, plus some extras for Mikko. (I figured the swap people could do the same for their kids if inspired).
I divided them into five sections of 1.5" width for each sticker section and a little wider for the section where you say what the card is "about" (in this case, the letter P). I used a ruler and a template card and then just drew the lines on them all while I watched TV. I tried to keep my template card pristine so I could use it as well, but Mikko decided he needed to borrow it, the ruler, and a dark blue marker. You can imagine that things didn't come back to me in the same condition as they left. Not even the plastic ruler, which was now coated with a nice haze of blue ink that smeared onto our hands as we worked.

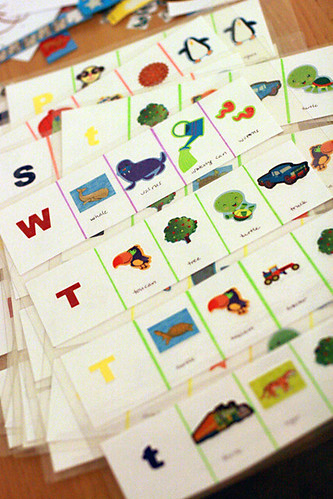
Then I sorted my stickers. The activity sheet Mikko had at preschool had pre-printed drawings on it, but, as mentioned, I am not artistic, so I decided stickers would save me the trouble of drawing pictures, and the users from deciphering my drawings. You could draw if that's a possibility for you, or you could use stamps or have your children draw the items. To make things easier on myself and to figure out if I needed to buy more stickers (I had picked some up at the store and raided our stash for others), I cut them out and put them into piles by letter. That's the P pile there in front, with S behind.
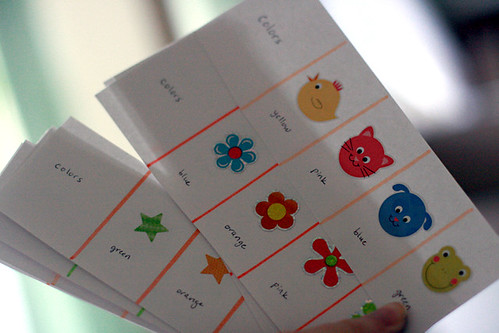
Other stickers I found seemed to work well for color collections, like so.

I made mostly letter ones (3 letter cards for a bag, plus 1 color one), and I used some letter stickers I bought to mark each card.
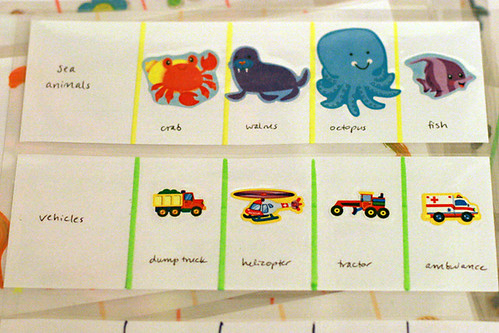
Later, for Mikko, I also came up with some other assortments that worked well with my stickers: sea animals (animals! see!) and vehicles. I figured you could also make some number cards, with a random order for the numbers, say, four stars in one square, seven in the next, etc., but I thought that sort of memorization might work better for a slightly older child. You can really use your imagination as to how to group your card items, though.
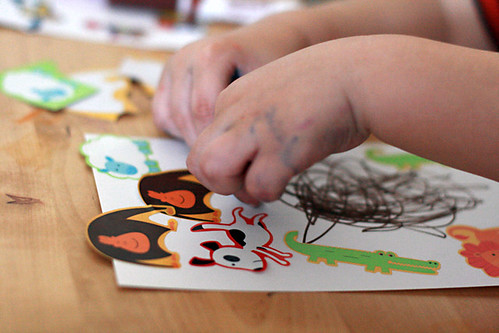
Mikko was quite taken by the stickers and, of course, wanted his own. I was mostly able to provide him with stickers that were too wide for my cards, although he wanted others as well. He also got a little upset that I was using his stickers for some of the cards (I'd told him they were gifts), which sort of surprised me and sort of shamed me. I should have asked his permission first!
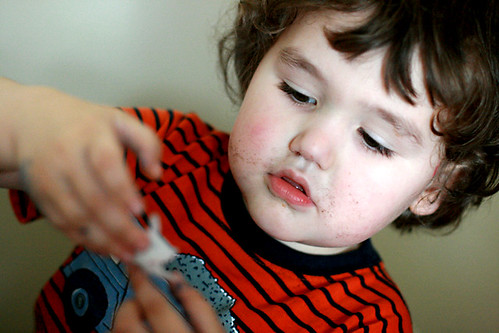
Admiring a new sticker. Somehow, he always seems to have a five o' clock shadow these days.

As shown before, this is now how he poses with things.
I then laminated the base cards and the activity cards with self-laminating letter-size pouches
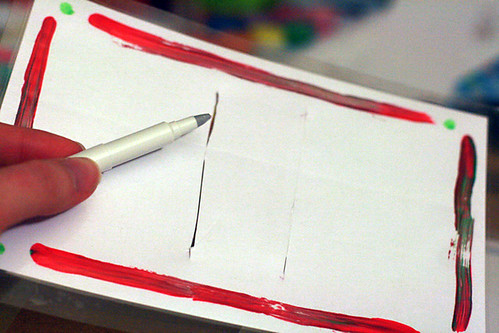
Then this part sucked, and I was up really late the night before the swap doing it. I had to cut a slot in the base cards that was centered, just tall enough to slide the activity cards into, and just wide enough (1.5 inches) to cover up exactly one picture at a time. I had this ceramic paper cutter, but I think I might have done better with a craft knife / Xacto knife
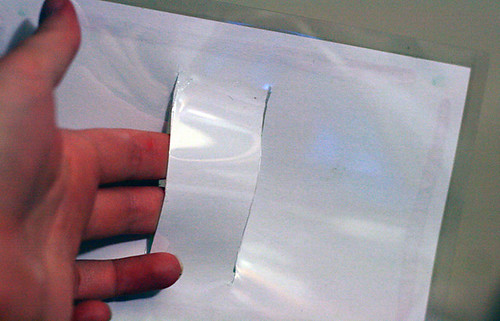
Anyway, I cut through the top layer of lamination and the paper, but the bottom layer was really thick and ended up staying uncut on all but the first two cards. It was actually fine that way, though, once I came to my senses and stopped fighting it.
I popped a base card and four activity bags in gallon size freezer bags, the type with the easy zipper on top
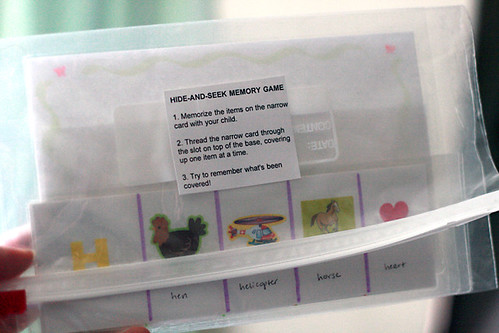
Here are the instructions:
1. Memorize the items on the narrow card with your child.
2. Thread the narrow card through the slot on top of the base, covering up one item at a time.
3. Try to remember what's been covered!

Then you can thread a card through to play the game!
Aha! One minute left. Posting now…
 March’s Families, Create! challenge was filled with awesome animal-themed posts. From Mo Willems to monkey finger puppets, our writers and crafters kept busy getting creative with the little animals in their lives.
Visit Code Name: Mama and Living Peacefully with Children to find out how you can participate in the next Families, Create! Carnival. Our April theme is "Fantasy" - childhood is a fascinating time, filled with magic around every corner. What can your family imagine and create?
Please take time to read the March submissions by the other carnival participants:
- Lizz at Am I a Funny Girl turns a family outing at the zoo into a picture book to keep.
- Maman A Droit shares her easy pattern for a felt monkey finger puppet with you!
- The kids at Living Peacefully with Children celebrated the emergence of Spring with butterflies. Check out their Coffee Filter Butterfly mobile and Pipe Cleaner Art.
- Aunalise at My Sweet Potatoes offers helpful ways for a child to remember calming techniques with a “Calming your Beast” basket.
- Most of us have monkeys running around our house at times. Or lions. Or elephants. Make your child's creative animal play even better with stuffed animal tails! Dionna at Code Name: Mama shares an easy tutorial.
- Galit Breen at These Little Waves shares an easy way to get creative with Mo Willems' "We Are In A Book."
- Maman A Droit shares her pattern for a felt bunny finger puppet-a perfect Easter basket filler!
- Brenna at Almost All The Truth shares a look at butterflies through metaphor, books and a coffee filter craft.
- Mandy at Living Peacefully with Children knitted some simple Nugget Bunnies for her children's Ostara baskets while practicing a new technique.
- Amy at Anktangle shares photographs of crocheting a lovable stuffed turtle for her son to play with.
- Aunalise at My Sweet Potatoes knows a few ways to bring beneficial birds to the garden.
- Megan at Purple Dancing Dahlias shares a fun little first sewing project.
- Lauren at Hobo Mama has a fun and easy game to make to stimulate your preschooler's memory.
- Using her children's artwork as inspiration, Mandy at Living Peacefully with Children woodburned wooden eggs for them to color in honor of Spring.
- Aunalise at My Sweet Potatoes is making nature bags or field bags for nature journals and the other things we may need as we explore our planet.
- Animals are the inspiration for this set of handmade clay items for an I Spy bag at Living Peacefully with Children.


 I'm Lauren Wayne, writer and natural parent. I embrace attached parenting with an emphasis toward green living.
13 comments:
So cute! We are hopefully going to be able to visit family for Easter if Hubby doesn't have too much work, so I've been looking for fun car distractions. A slidey memory game with lots of options is perfect!
I LOVE this idea. It seems like a perfect way to occupy little minds and bodies. And it's portable. Now, if only I had a crap load of stickers...(clearly I'm a terrible parent. I don't think we have a single sticker. Unless you count postage stamps...)
This is so great!! I guess I better dig up that laminator we got for Christmas.
Looks like you did a lot of work, but so much fun.
And is it my imagination or are you getting funnier as your pregnancy progresses? Maybe filtering yourself less?
Or have I just not been reading you long enough?
thanks for the ideas and the laughs!
@lifeversiontwo:What is WRONG with you? ;) Now, to be fair, I grew up an avid sticker hoarder, so Mikko started off this life already overly blessed with stickerage.
@teresa: That's writing when I'm sleep deprived for you! :)
I agree with Teresa, you HAVE been funnier ;)
This is a really cute idea, and how fun that you participated in an activity bag swap! I totally wish you were in MY group when we did our swap!
Yaaaay! Glad you had fun with the swap! My girls love your game, too -- they love remembering the pictures and getting them right, ha ha! I am thinking of adding another row of stickers right on the back of them, to double our card choices, or maybe using wipe off markers so we can just keep changing them up on the backsides.
While it was way more challenging, having Mikko help every step of also really cool.
I am glad sleep dep brings out your funny side because for me it usually does the opposite -- and that is not pretty!
Thanks again for being part of our swap. And kind of inspiring it too, ha ha!
Oh I love this!! I want to make it now...but it's 1am and I have NO stickers...ok I'm bookmarking it to make sometime this month for sure. And yes like others have said I enjoy reading your posts both for the information and the laughs :-)
I haven't been in a swap since last December. What has happened?
So Cool! I am now on a mission to make these for the littles in our house and some extras for those birthdays that I leave to the very last second. I waited until almost the very last minute on the 31st to post as well, so you are not alone :)
These are amazing! I really appreciate the creativity, prettiness, and educational value of this project! *Love!*
This is a good idea! I really love all your pictures, they really capture the moment.
What a fun idea. I imagine you could create a "what doesn't belong in the group" type activity too.
I also really love your pictures of the process!
Post a Comment