My post on BabyLegs inspired me to start an ongoing series highlighting products that have made my life easier in pregnancy, birth, or parenting. I've been commenting on products in other people's blogs and realized I've never mentioned some of my faves in my own.
No one's paying me to plug their products, and in many cases I used a made-at-home version, crafted either by myself or by someone online. Granted, I'll use some affiliate links, but you're free to ignore them. I think they're helpful for illustration purposes (free stock photos!), at any rate.
Today I'm going to sing the praises of the belly band. You might know it under such commercial names as the BellaBand or Tummy Sleeve.
A belly band is a stretchy tube of knit fabric that hugs around your tummy.
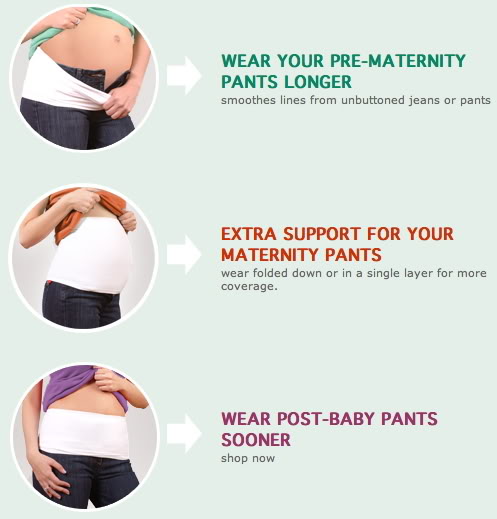
You use it in early pregnancy to wear your non-maternity pants longer -- just unfasten them as needed, and let the belly band be your hide-it-all, wide belt. You can scrunch it down or pull it up.
You use it in mid-pregnancy to keep up your maternity pants. Sometimes those stretchy bands that come standard on maternity jeans don't stay up well until you're seriously popped. The belly band gently constricts and keeps your pants in place. Very important to keep your pants secure when you're already feeling a little conspicuous!
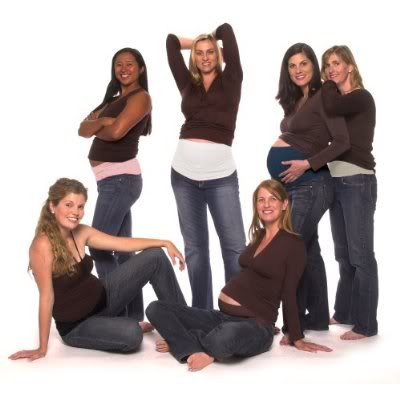
I liked the safe, hugging feeling it gave, and wore mine throughout the pregnancy. Toward the end, it's nice to hide any lowdown stretch marks while still showing off the cute (huge) shape of your bump. Also, especially if you have a long torso, you'll find that maternity shirts don't hide your whole tummy toward the end. The band keeps your belly respectably covered. Plus, the layered look it gives is fashionable without being bulky, particularly helpful if you're sweating your way toward a summer birth.
After you give birth, you can go back to wearing your belly band as when you were just starting to show -- to keep up your suddenly looser maternity pants, or to add some give to your regular pants as you flirt with resuming a contoured waistband.
For nursing, it can help you breastfeed discreetly without a special nursing top. Just spread it out from your waistband to under your bra, then raise your shirt to breastfeed. The belly band will keep your tummy, sides, and back comfortably covered.
Being tall and carrying a 12-pound baby (ok, I didn't know it at the time), I worried that the commercial versions might be too tight on me because I'd heard the fabric and sizing were particularly snug (though I believe they've come out with more sizes since then). The last thing my sensitive protruding stomach wanted was to be squished!
So I went online and found sellers on eBay who offered a range of sizes. (I've put in a cool little widget at the bottom of the post so you can see who's currently selling any type of belly band, or or use this link.) Some sellers make belly bands according to your measurements, and some simply recommend a particular diameter according to your pre-pregnancy size.
I picked the seller with the fabric I liked best -- a soft cotton jersey in all-purpose black.
And then I wore that sucker every day. I dreaded whenever I felt it needed washing, because then I had to wait for it to drip dry. Fortunately, despite my obsessive daily wearing, it never got smelly, I think because it was over my waistband for the most part.
I realize it would be very easy to make your own belly band. Simply buy a foot of stretchy fabric, like jersey knit. Measure the smallest part of your belly or use a tight t-shirt as a good guide. Fold the fabric over (right sides together if your fabric has such a thing) and sew up one seam, using the setting your sewing machine recommends for knit fabrics -- generally some sort of zig-zag or specialty stretch stitch. Knit fabrics usually don't fray on the edges but roll, so you shouldn't have to hem the sides. You might want to hem for looks, but make sure you serge or keep using the stretchy setting so your band's not constricting on the edges.
I was entirely planning to make additional belly bands on my own but wanted to buy my first one to make sure I had an idea of the size and height of the band. But then I could never find a suitable fabric at the store -- I'd find something that was too stretchy, too thin, too gaudy, too slippery, or too expensive. The band I bought was really the perfect combination of opaque, taut, and soft, with just enough give. Because it was black, it disappeared under my clothing so no one was assaulted by a strange swath of, say, lime-green peeking out under my maternity shirt. I really wanted to find some dark brown or navy blue jersey, perhaps even in a tasteful print, but I couldn't. Very discouraging, and bizarre. Maybe there was a run on those shades in Seattle, for nine months?
But these DIY instructions tell you just to use an old t-shirt you have lying around. Depending on the shirt, it might not be quite as snug as the jersey in my favorite belly band, but it would definitely be soft! Plus, it's a good way to recycle and be all frugal. Bonus -- if your t-shirt is tight enough, you don't have to sew a thing, just cut off the top! If you wear your t-shirts oversized, though, you'll need to take in the width a little and create a new seam.
If you're making your own and want to get fancy, you could sew some nice stretch lace edging on the bottom, as in some of the commercial styles, to give more of an obviously layered look.
For a little more money, and perhaps sacrificing some of your self-respect, you could head out to the local five-and-dime (I'm pretending these exist) and be the creepy pregnant woman buying a tight tube top from the juniors section.
So there you are, ladies -- all my tips for the fantabulous belly band. Keep your pants up and your dignity intact, no matter what your tummy size.
I have so much to say about In Defense of Food, by Michael Pollan, that I haven't said anything since my initial post after I'd read the intro. It just got better after that, but I had so many thoughts it was overwhelming. I decided to try to break it down into manageable chunks and write when specifically inspired.
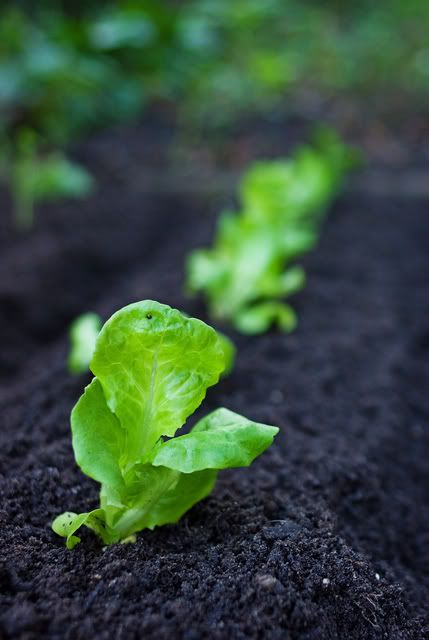
Today's specific inspiration came yesterday actually, when I was writing about starting my garden for this year and reminiscing about my satisfaction with last year's tomato harvest.
Pollan in his inspirational and practical last chapter quotes Wendell Berry, who in "The Pleasures of Eating" wrote:
"Eating with the fullest pleasure — pleasure, that is, that does not depend on ignorance — is perhaps the profoundest enactment of our connection with the world. In this pleasure we experience and celebrate our dependence and our gratitude, for we are living from mystery, from creatures we did not make and powers we cannot comprehend."
Pollan talks about the counter-cultural and cost-saving benefits in providing one's own food:
"To take part in the intricate and endlessly interesting processes of providing for our sustenance is the surest way to escape the culture of fast food and the values implicit in it: that food should be fast, cheap, and easy; that food is a product of industry, not nature; that food is fuel, and not a form of communion, with other people as well as with other species — with nature.
"... To the problem of being able to afford high-quality organic produce the garden offers the most straightforward solution: The food you grow yourself is fresher than any you can buy, and it costs nothing but an hour or two of work each week plus the price of a few packets of seed." (p. 197-198 in my rechecked-out library copy)
Gardening requires honest work, and quite a bit of it, but the reward is truly appreciating the food that sustains you.
I wrote before that Pollan's book combats the cult of nutritionism, the reducing of food to its constituent scientific parts (or, at least, the ones we know about). Food in the nutritionist view is only a collection of various fats, carbs, and vitamins, and if we don't know what makes it good, then we can't appreciate it. As I've been planning my veggie patch, I've been struck by how the seed packets tout the vitamins inherent in kale and broccoli — as if anyone would doubt that such leafy greens are good to eat! As if that's how I'd choose what to grow — oh, this one's high in vitamin C but not A, never mind — over such niceties as what kind of food we like to eat, or what I think will work well in our garden patch. But we've come to a point in American food consumption where we trust our experts over our own common sense and cultural traditions. Growing your own (vitamin-rich, who knew!) vegetables is an exercise in getting back to what we instinctively know is good for us.
In that vein, Pollan goes on to wax poetic about the garden's bounty (and, hearing his description of his Californian fruit trees, I confess to being a little jealous that I live farther north!):
"When the basket of produce lands on the kitchen counter, when we start in on the cleaning and cutting and chopping, we're thinking about a dozen different things — what to make, how to make it — but nutrition, or even health, is probably not high on the list. Look at this food. There are no ingredients labels, no health claims, nothing to read except maybe a recipe. It's hard when contemplating such produce to think in terms of nutrients or chemical compounds; no, this is food, so fresh it's still alive, communicating with us by scent and color and taste. ... The cook does not need to know, as the scientists have recently informed us, that cooking the tomatoes with olive oil makes the lycopene in them more available to our bodies. No, the cook already knew that olive oil with tomatoes is a really good idea.
"As cook in your kitchen you enjoy an omniscience about your food that no amount of supermarket study or label reading could hope to match. Having retaken control of the meal from the food scientists and processors, you know exactly what is and is not in it ... To reclaim this much control over one's food, to take it back from industry and science, is no small thing; indeed, in our time cooking from scratch and growing any of your own food qualify as subversive acts." (p. 199-200)
"Subversive acts." That's the kind of thing I can get behind. Vive la kitchen-garden revolution!
Maybe it's the unseasonable taste of sunny weather we recently enjoyed in Seattle. Maybe it was the primroses parked outside the grocery store.
But suddenly I realized -- it's time to garden again!
We have a couple small raised-bed gardens out back. Now, some people do raised-bed gardening because it's the new, cool gardening thing to do.
We do it because "out back" refers to a concrete patio. There is no dirt except that which we trucked in ourselves and piled high into the corners.
But, you know what, despite the naysayers (I'm talking to you, Dad), the plants (for the most part) don't know any better and have been thriving.
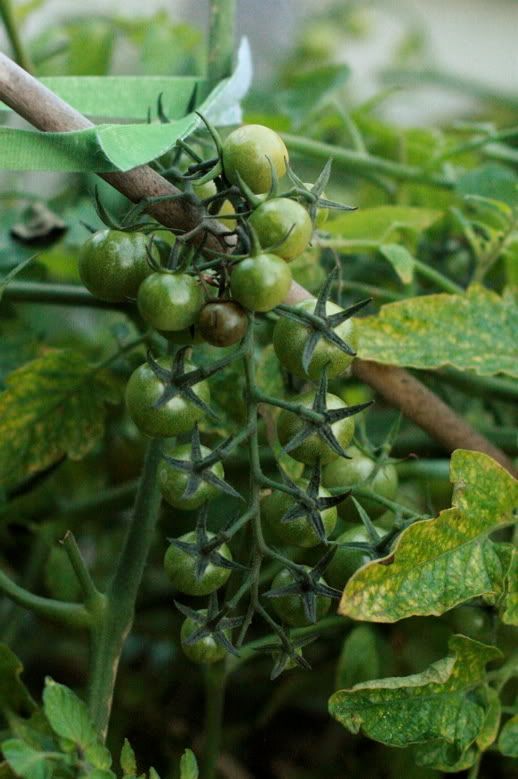
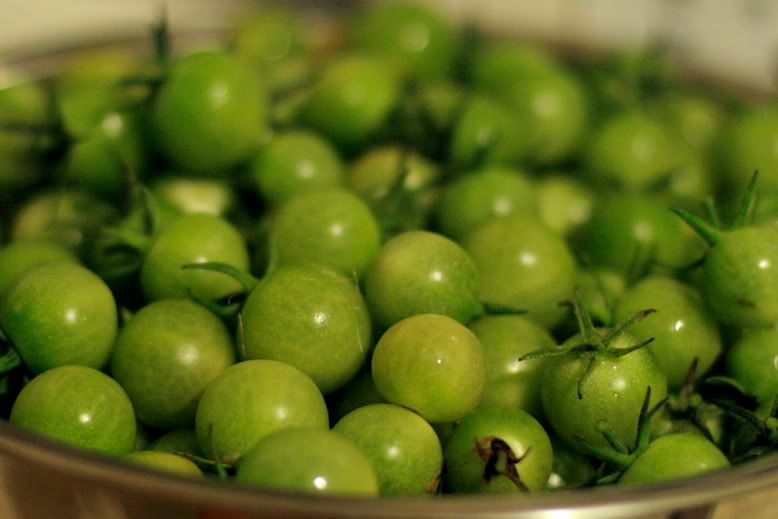
Case in point: our wild and woolly cherry tomato plant that took over the fruit-and-vegetable section last year. With a warm autumn, before the unexpectedly ferocious winter storms hit, the tomato plant just kept popping out fruit. I didn't know what to do with it all and wasn't confident it would ripen before our first freeze.
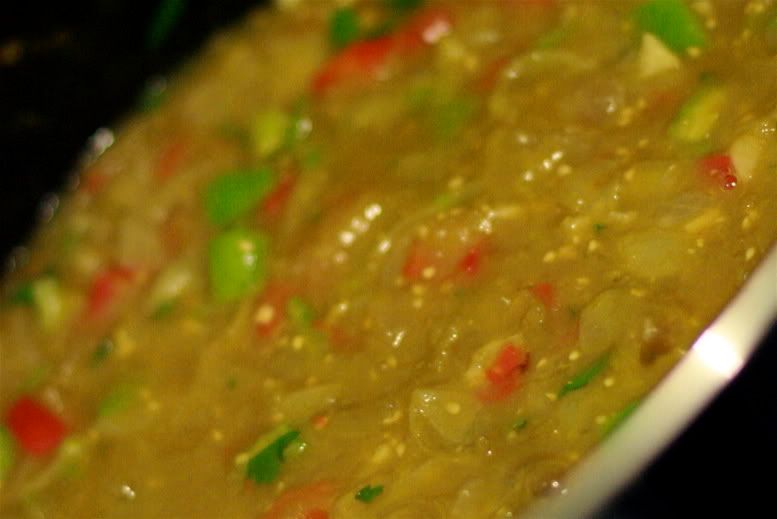
I mostly followed the instructions and felt oh-so-homey making my own tangy, homegrown salsa to use as zest for a dozen meals.
It looked and smelled really bad cooking, to the point that Sam had to be adventurous for me in being the first to taste it, but it was so good. I point this out just in case any of you decide to make the relish with your late-season crop of unripe tomatoes, catch of whiff of it bubbling away, and start wondering if you've wasted your time, ingredients, and tiny mind. It really is worth it, and it feels so satisfying to use up all those green tomatoes!
This year, I've been inspired to germinate my seeds indoors before planting them outside, and I'm risking more variety and more quantity. I really don't know what I'm doing in terms of gardening, ever, so I just experiment and sometimes things work. But I take a lot of cues from friends who are gardeners, and now cyber-friends who are gardeners.
Farmgirl Susan has a newer blog titled In My Kitchen Garden, and she writes about planning and dreaming over seed catalogs for her raised beds, which are respectably located on top of actual soil. (I saw the pictures.)
I'm getting my hands dirty every day, Mikko looooves digging soil with me, and I've set up a little shelf with DIY grow lights over my seed tray. I see little sprouts of green already!
They say hope springs eternal, but maybe it's spring that grants the hope. I don't know what's coming up, but I'm looking forward to it.
I feel a little behind on this, but Motherwear's Breastfeeding Blog posted about an ongoing study based at the University of Massachusetts concerning potential early detection of breast cancer through breast milk. The researchers are looking for women who are breastfeeding and are scheduled or have recently undergone a biopsy.
Dr. Kathleen Acaro is analyzing epithelial cells in breast milk "to determine if it's possible to create a non-invasive, early way of assessing our breast cancer risk through our breastmilk. If it's successful, it would also establish 'molecular biomarkers' for breast cancer risk" (quote from the original post). It would also reduce the chances of doctors advising women with unfamiliar lumps to wean in order to be diagnosed.
The project's site is BreastmilkResearch.org. If you qualify for and consent to the study, you'll be asked to donate a breastmilk sample from each breast.
Visit the Motherwear blog post or the project website for more information or to participate, and spread the news about this exciting research to any breastfeeding mamas you know through your blog or word of mouth.
I've written before about how much I heart BabyLegs, a Seattle-based, mama-started company offering nifty little leg and arm warmers.
I have even more reason to love it now -- they think Mikko's cute! See, you can send in pictures of your little one, and if they like them, they might select one to appear in a future e-newsletter.
Mikko's payment for being adorable?
A free pair of BabyLegs, yo!
We picked out Blue Flame. It was hard to choose, because we already have so many. We liked how the primary colors match his boy-hued clothes, and, also, we thought they were rockin'.
If you want to sign up for the BabyLegs newsletter so you might see your offspring in there, too, one day, contact the staff at BabyLegs.com.
Incidentally, that's not Mikko up there in that picture. I haven't yet received his debut appearance as a professional baby model!
(Do I sound like I'm going to turn into one of those Toddlers & Tiaras moms? I'll try to rein in my vicarious enthusiasm.)
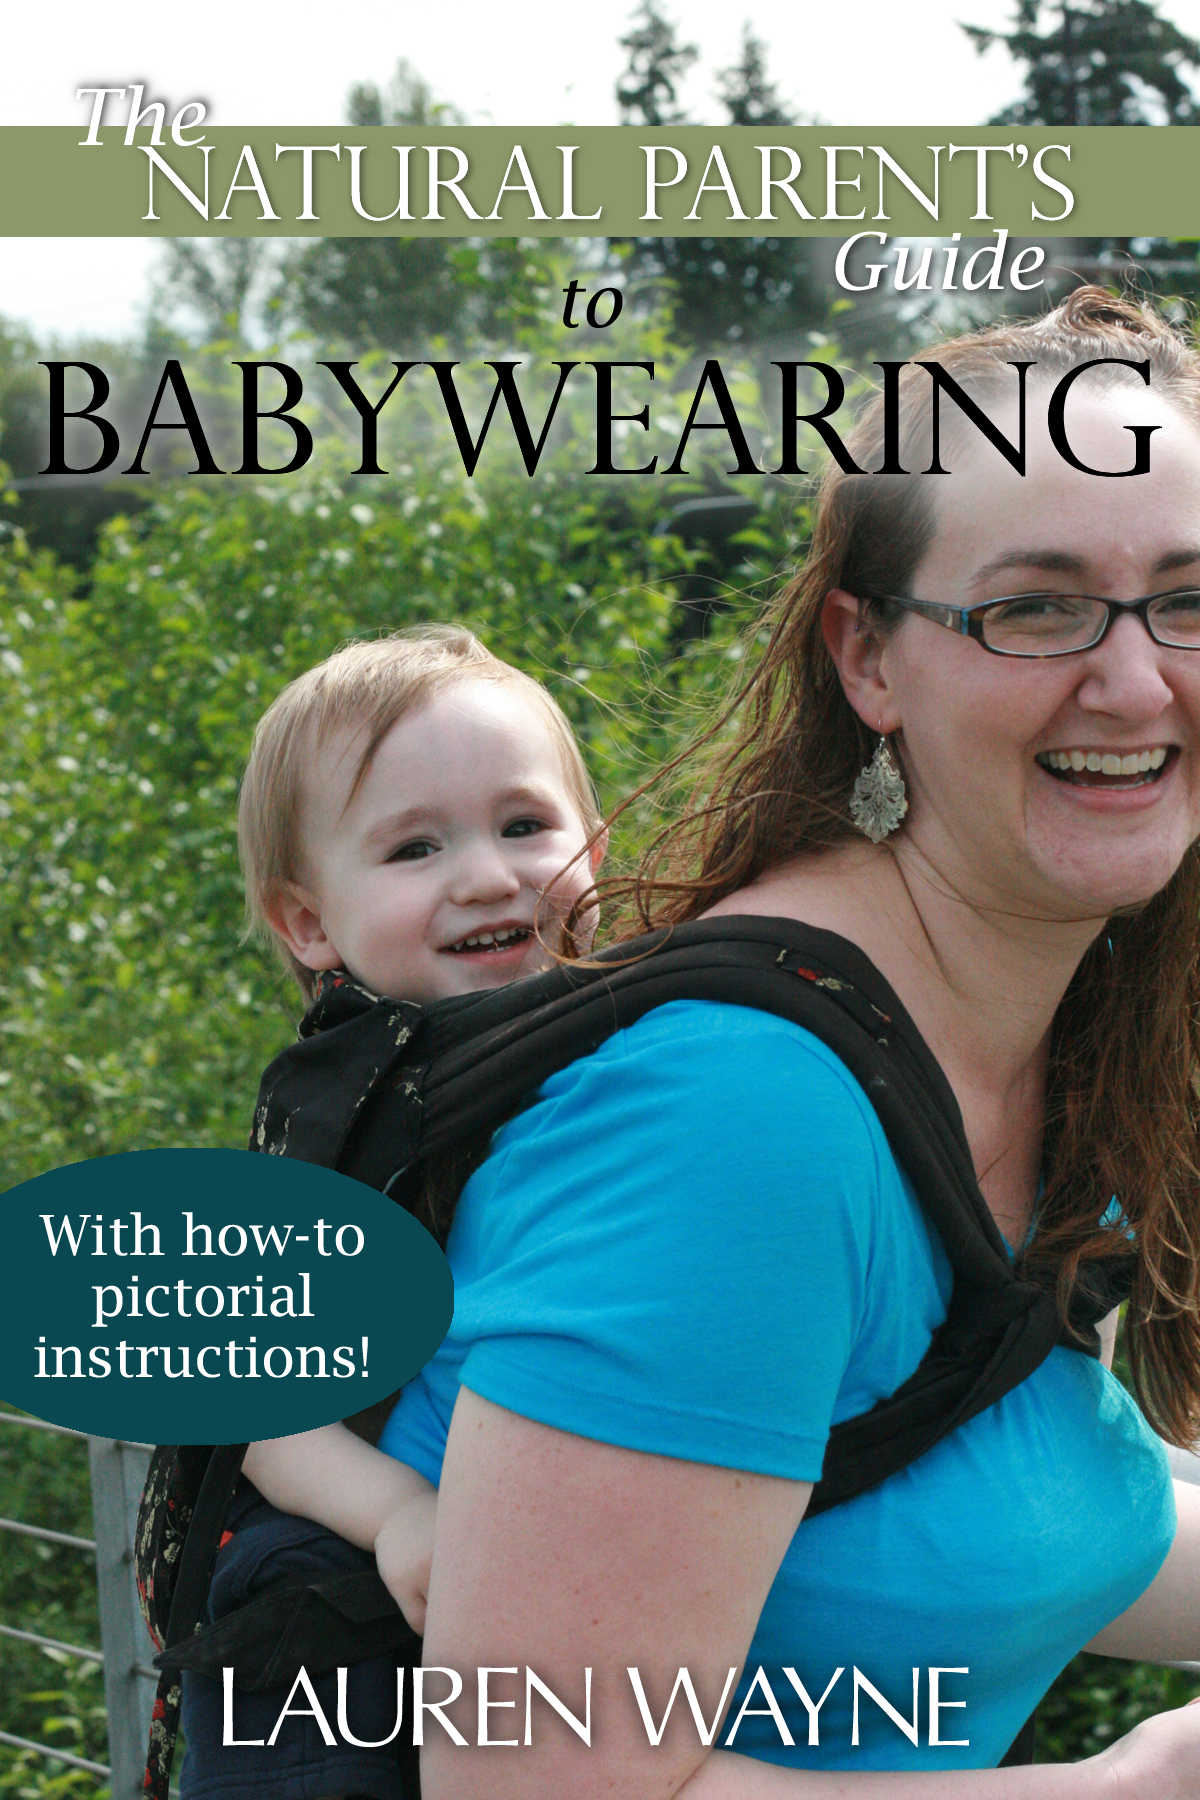
This is third in my series on helpful baby carriers for the heavy baby. (Links to the other posts in the series are at the end.)
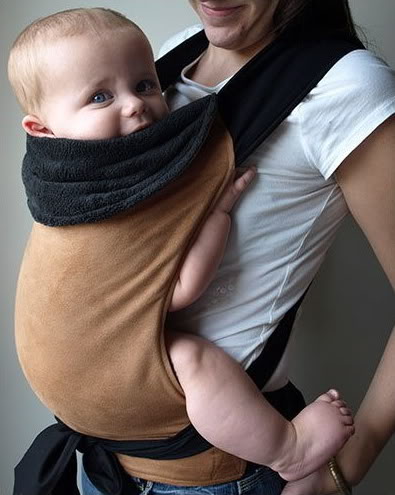
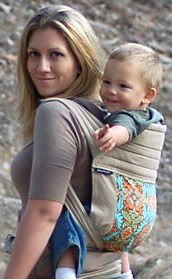
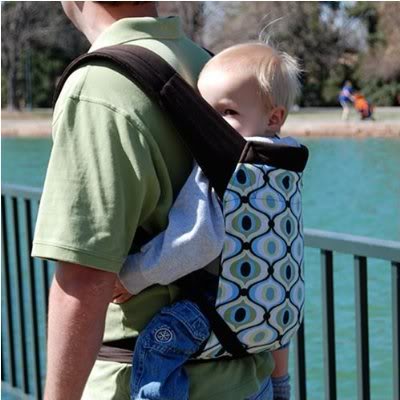
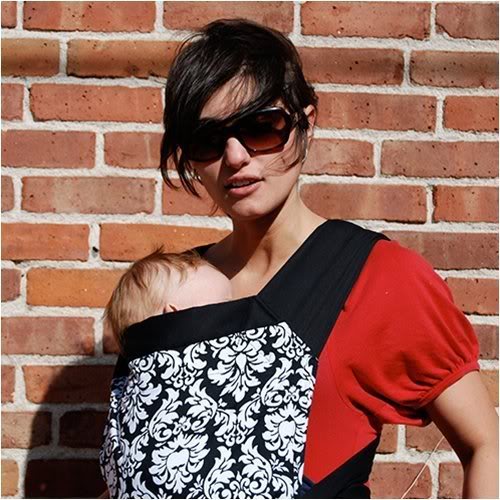
Today I'll highlight the mei tai baby carrier, also known as an ABC or Asian-style Baby Carrier.
MEI TAI:
Best timeframe: Newborn to toddler age -- if there's support for the back of the head, even very young babies can use the mei tai, and if it's sturdy enough, it can be used indefinitely, but it's ideal for ~4 months to 3 years or whenever your baby is too heavy for the fabric and straps
A mei tai (pronounced MAY-TIE) baby carrier consists of a rectangular blanket area that spans under the baby's bum up over the baby's back, two shorter waist straps for the adult that support the baby's weight, and two longer shoulder straps that cross over the adult's front or back (depending on carry) and then across the baby's back or under the bum to offer additional support for the little one.
The typical mei tai carriers in use in the West might not be "authentic," which is why they're referred to as Asian-style, but they're similar to carriers used traditionally in countries like China. Variations include the podaegi, a Korean carrier with a more substantial blanket and with just two straps instead of four. Soft but more structured baby carriers with buckles, like the ERGO, are based off of the mei tai. (But I'm getting ahead of myself, because that's next in the series!)
Tie one on
The best part about the mei tai is it's sooo easy to put one on. It's probably the easiest carrier to use. Seriously.
It's always complicated-sounding to describe something, but I'll give it a shot here, and remember that it's easier to do it than to say it!
Here's how to put a baby on your front. You'll probably want some assistance, at least at first, so I'll assume you have a helper.
1. While someone else is holding the baby, let the fabric blanket part drape in front like an apron and tie the waist strap tightly (as tightly as you can stand -- this will support the babe) around your waist, knotting it at the back. Don't be afraid to tie a tight knot -- you can get it undone when you need to.
2. Now hold your baby upright against your chest. For an older baby or toddler, spread the legs around your waist, as you naturally would if you were just carrying your little one. For a newborn, you'd want to modify this by either letting the legs scrunch up like a frog against your chest, or by turning your baby a little more sideways inside the blanket. A newborn's legs won't stick outside the blanket part, but an older child's will.
3. Bring the fabric up over the baby's back.
4. Your helper will take the shoulder straps and smooth them over your shoulders, cross them over your back, and hand them back around to the front.
5. Holding your baby snugly against your chest, pull tightly on the shoulder straps and tie them in a knot either behind your baby's back (which provides extra support for a younger baby) or under your baby's bum (which provides extra weight support for an older baby). You can tie it over or under the baby's legs; we usually did over the legs and under the bum, because of how heavy our baby was!
Clear yet? Maybe a video would help:
So that is the basic front carry.
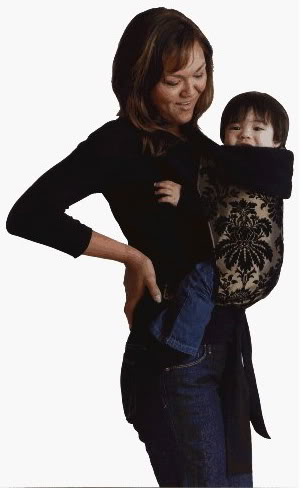
Carry your baby every which way
As your baby gets bigger and heavier, you'll want to try out a back carry, or maybe even a hip carry. You can find all these carries and more information besides on the website of a wonderful mom-designed mei tai, the Kozy Carrier. Take a gander at those pictorial instructions, because they also show you how to get your baby onto your back, how to carry a newborn, how to alter the length of the mei tai's body, and how to nurse in a mei tai.
For the heaviest of babies, the back carry can't be beat. If you have nice, thick straps that are spread out smoothly, the weight should be evenly distributed across your torso. For on-the-go nursing, of course, you'll need to do a front or hip carry.
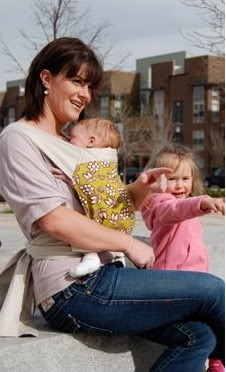
Just like the wrap and the ring sling, an unpadded or lightly padded mei tai can also be used as a small blanket, nursing cover-up, burp cloth, or pillow. And it's easy to fold up to travel light in a diaper bag. Many of the commercial versions have padded or thicker straps, which might make it slightly less squishable. Still, the mei tai is a lot less fabric than a wrap so is easy to bring along anywhere.
And, with a mei tai, you really can go everywhere with your baby. The hands-free convenience and even distribution of weight, particularly if your baby's on your back, means you can comfortably hike into the wild -- or get the dishes done at home.
Our mei tai was homemade -- yes, by me. Before you get all impressed, the skills required were being able to use scissors. As long as you graduated elementary school, you're golden.
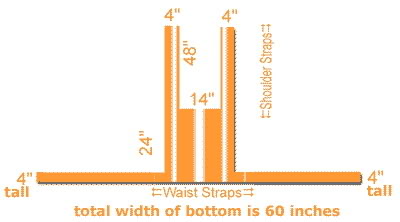
A warning about the Mamatoto pattern: It is not to scale. Not even close to scale. For instance, if you look at their drawing, you'll see that 24" and 48" look just about the same, whereas in real life one is considered twice as big as the other. (I told you I passed elementary school!) The waist straps are shorter than the shoulder straps in real life, but in the drawing an optical illusion makes them look longer. See, confusing, right? So you might think hard about the measurements and redraw the pattern more to scale on a piece of scrap paper to refer to. That helped me, because I am very dense when it comes to thinking in 3-D.
Furthermore, if you're as stupid as I am spatially, I recommend measuring while marking your fleece with chalk and/or pins, then measuring again, then fixing your marks, then measuring again, then fixing them again, then realizing you're doing it all upside down and starting over...you get the drift. But, seriously, measure and mark until you're sure you've got it right and only then start cutting. Fleece is thick and the edges forgiving, so you don't have to cut precisely straight to have it still look good.
You can buy your heavy fleece at any fabric store. If you're really lucky, as I was the first time around, Jo-Ann's will be having a sale on some kick-butt embroidered fleece. You need only two yards, so you can live it up a little, price-wise, but sales are always excellent! If you can scrounge up only very boring monotone fleece, you can always liven things up a little after cutting by doing some embellishment of the blanket area yourself. You could sew on a contrasting back panel or pocket, or do your own embroidery or fabric painting. As with all carriers, though, I recommend remembering that you will be wearing this, so make sure it's something you'd want to be seen in.
One very important consideration for me and mine was that the fabric be neutral enough to suit both my husband and me. We found a rich brown embroidered with a swirly tan botanical print. Sam loved the mei tai more than any other carrier and always insisted on using it, so apparently I chose good. The mei tai's sleek, unfussy design is the type to appeal to guys, so that's also a plus. Yea for daddy babywearers!
The mei tai we used was made exactly to the Mamatoto specifications, but I figured out what I would do differently over many moons of wearing our guy around town in it. When a friend asked me to make one for her (and didn't believe me when I said it was super easy and she could do it herself but told me I should start my own business selling them on eBay!), I modified the measurements somewhat. If this is your first time considering a mei tai, just ignore me here (plug your ears and go la-la-la), but if you're hip to the mei tai scene and just dying to use your own fleece, I'll explain what I altered. I made all the straps wider, more like 6 inches instead of 4. By the time our little man reached 30 pounds, 4-inch straps were starting to cut into our skin, which is why some padding might have been nice. I also made the body longer, since our heavy baby is also a tall baby, with a long torso. Toward the end of our mei tai days, I felt like the body didn't come up high enough on his back for my comfort (physical and mental). Because the body was longer, though, for younger babies it now would need to be rolled up a bit, as you can see at the bottom of the page in the Kozy instructions.
Other crafty options (that require sewing ability) are listed on Jan Andrea's page under "Asian-Style Carriers." If you can sew, the sky's the limit in terms of your fabrics and construction. You could make a two-tone reversible mei tai or add a fun extra like a strap pouch.
Buy online
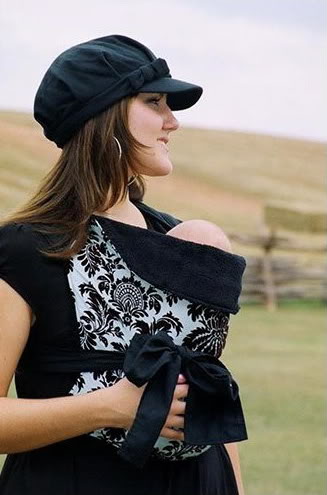
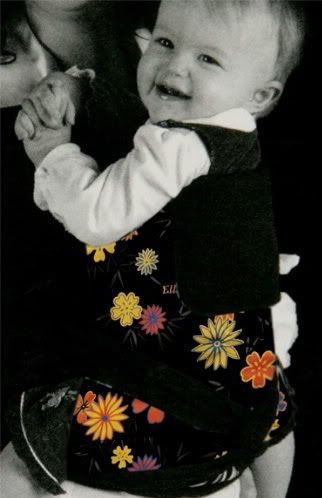
I loved how soft, portable, and unique our do-it-yourself fleece carrier was (and how much it impressed people when I told them I'd made it!), but I can see the benefit of a commercial Asian-style carrier. The wider (and often padded) straps will give you more support as you carry a heavy baby. And, golly, there are some real beauties out there in terms of fabric and design. Just look at the pictures on this page for a start!
The images in this post link to some of the commercial versions available on Amazon, such as the FreeHand, Ellaroo, BabyHawk, and Parents of Invention. Kozy, as mentioned before, makes some gorgeous ones, and there are always options on eBay (see the box on this page for current mei tai listings) and in etsy shops. Many of these mei tais (or maybe all, but I'm too lazy to research right now) have been designed by loving parents, not big corporations, so you can feel happy you're supporting some really cool alternative-style businesses.
We gradually retired our homemade mei tai in favor of a more structured and padded soft carrier (spoiler alert...it's an ERGO), which I will explore in the next (and final -- I think!) post in the series!
I'm Lauren Wayne, writer and natural parent. I embrace attached parenting with an emphasis toward green living.
Riding the rails with my husband, Crackerdog Sam, and our hobo kids, Mikko Lint Picker (born June 2007), Alrik Irontrousers (born May 2011), and Karsten (born October 2014). Trying every day to parent intentionally and with grace.


 to keep up your suddenly looser maternity pants, or to add some give to your regular pants as you flirt with resuming a contoured waistband.
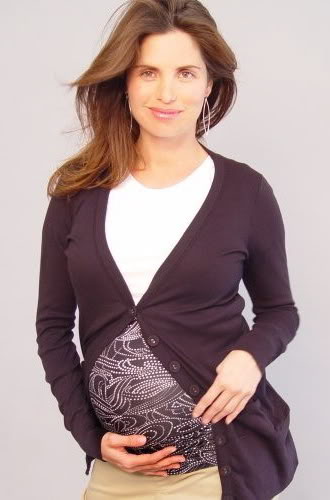


 I'm Lauren Wayne, writer and natural parent. I embrace attached parenting with an emphasis toward green living.


