
 Need a fast present to whip up for a little kid? Want a project that uses the fabric (any fabric) you have on hand and requires very few extra supplies and little in the way of talent? Stellar.
Mikko has a truckload of Groovy Girls dolls
You can easily adapt these instructions to fit any size doll you have on hand — just grab it to "try on" the clothes and find some fabric scraps. I used some cotton prints I had from my childhood. Nothing like using some vintage material!
You could even sew these clothes by hand if you need to — the sizes are such that it won't take long, even if it will be a little boring.
Wash and dry the fabric you're going to use to shrink it if it's going to. Then it will be washable in the future if your little one is a mite messy while playing with it. I've had good luck putting my fabric into a mesh laundry bag
Now we're ready to sew!
Wrap skirt
The star shirt came with the doll on the left, so this is for the little flowered skirt below!Supplies
- Small piece of fabric — I used a standard-weave cotton, which is easy to sew. You can use whatever as long as you know how to sew it!
- Small fastener of some sort — I used sew-on Velcro hook-and-loop tape.
- Coordinating thread
How-to
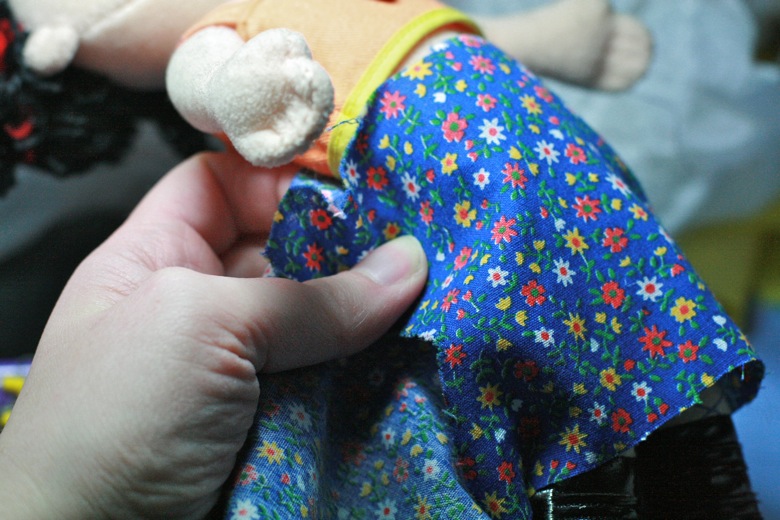
Wrap your (washed, dried, and ironed) fabric around the doll so you see how much you'll need. Allow an inch on the skirt length to allow for hemming, and two inches on the width to allow for the wrap and seam allowance.
(Those measurements are kind of a guess — but take it from the person who cut TWO scraps too small initially that it's better to have too much fabric than too little. Wait — why am I giving sewing tutorials?)
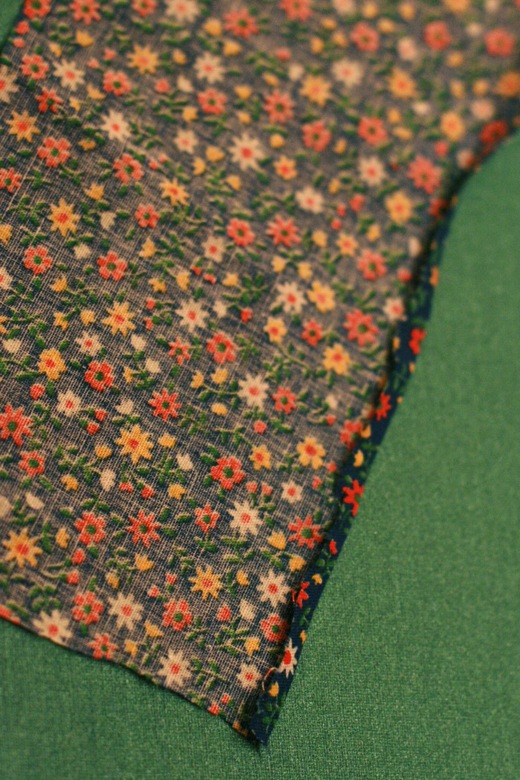
Fold in each long edge 1/8 to 1/4 of an inch and press it in place.
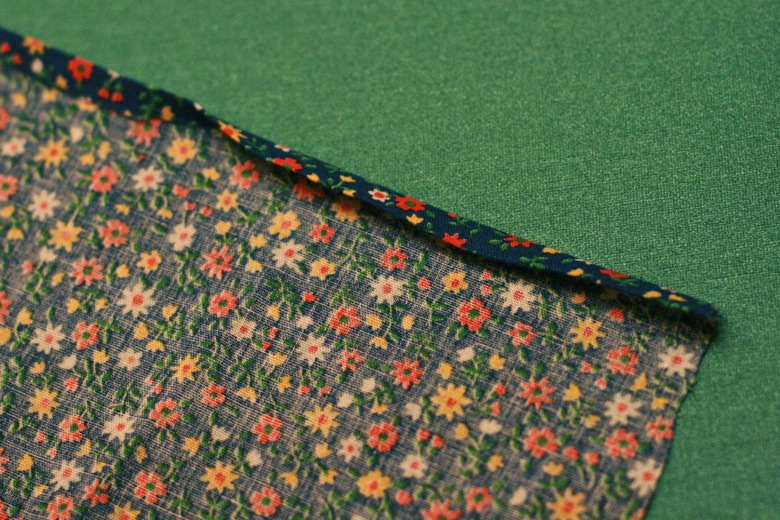
Fold it one more time and press. This will keep the raw edges tucked away.

Do the same folding and pressing to the ends.
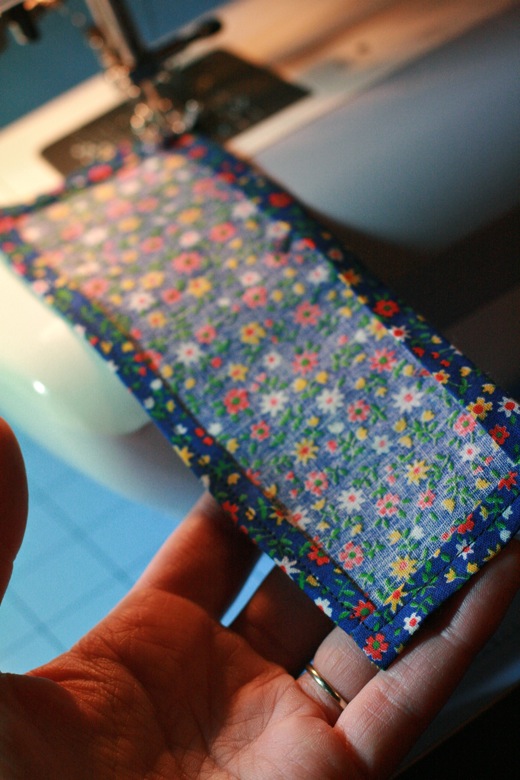
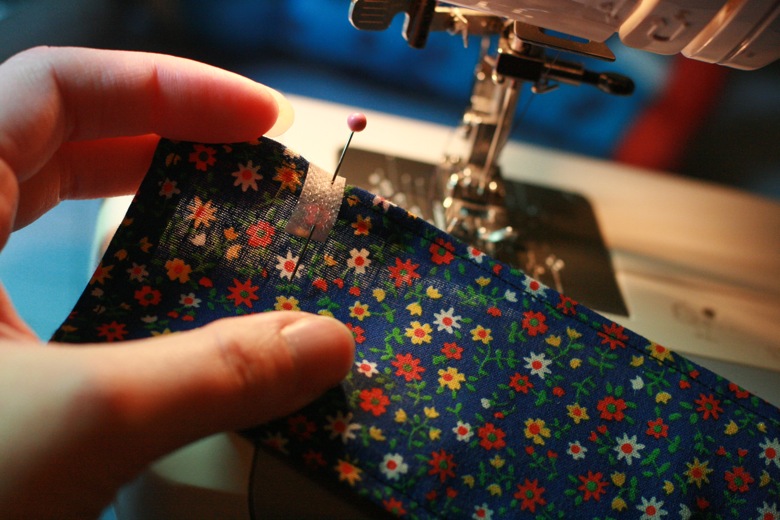
Straight stitch around all sides with a coordinating thread.
Tip for newbs like me: With an easy rectangle like this, it's a cinch to start in one location and never clip your threads until you get back to where you started — when you come to a corner, just leave your needle down in the fabric, lift up the presser foot, swivel the fabric 90 degrees, drop the presser foot, and continue sewing in the new direction. If you can aim to sew over your original starting stitches, you won't even need to backstitch to lock the stitches as you start.
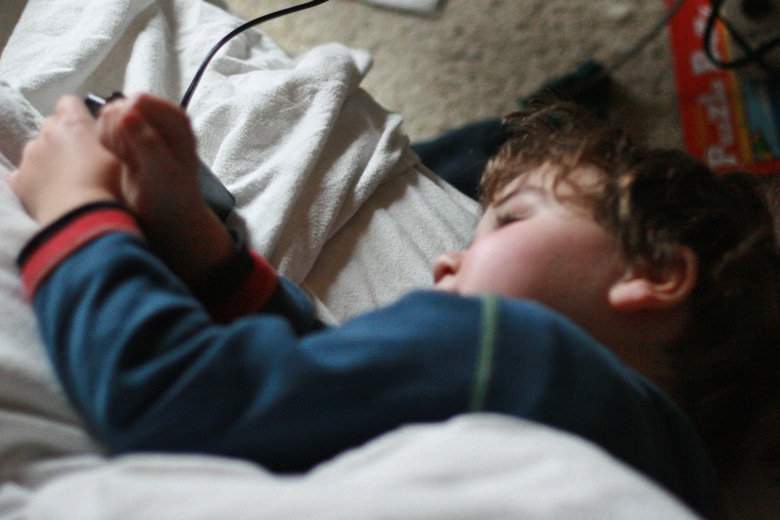
Make sure you ask a four-year-old to help press the pedal on your sewing machine. Give him somewhere comfy to lie down on the job.
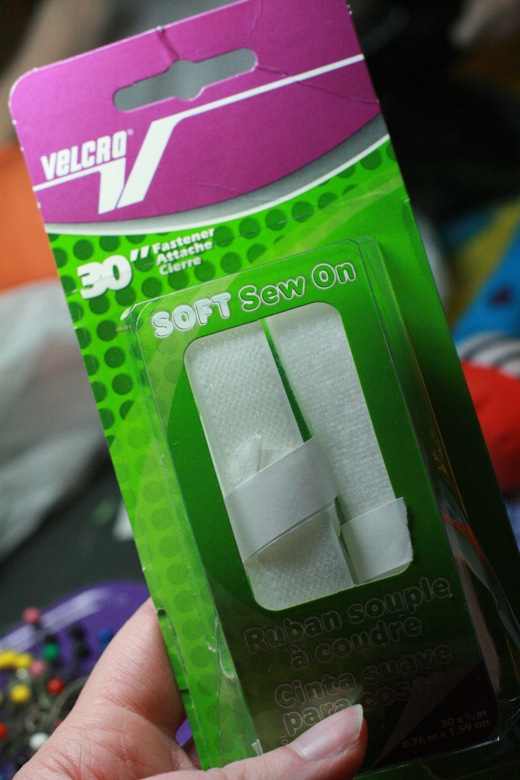
I was all prepared to call my fastener of choice "hook-and-loop tape" till I realized I had legitimate Velcro
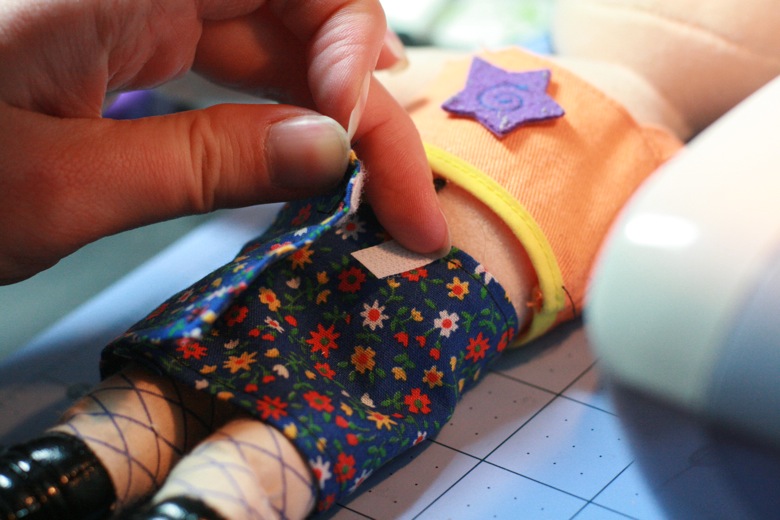
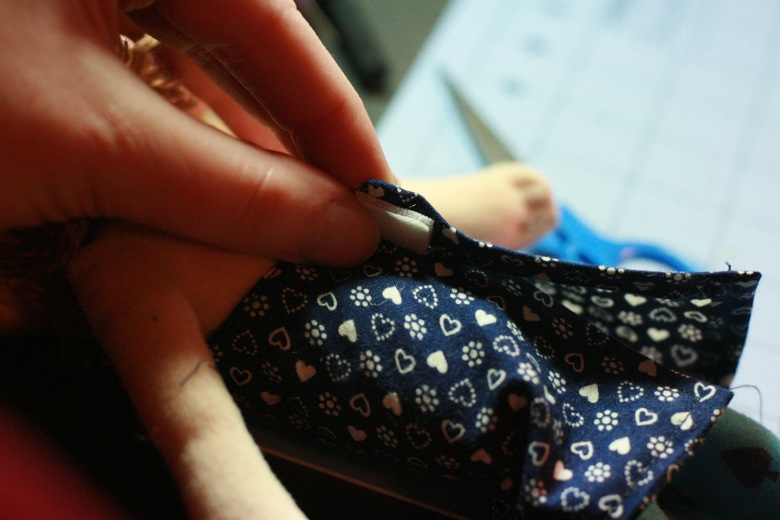
Cut out a small piece of the hook-and-loop tape and match it up with its corresponding side so you can cut the same size of that one. Sew one of the pieces to the top corner of the fabric on the reverse side. (If your fabric doesn't have a strongly directional print, just pick a side to be the top.)
Then fold the skirt over your doll, stretching it taut to figure out where the other piece of tape should go.
Mark where the other piece of tape goes or pin it in place. Then sew the other piece of tape down as well.

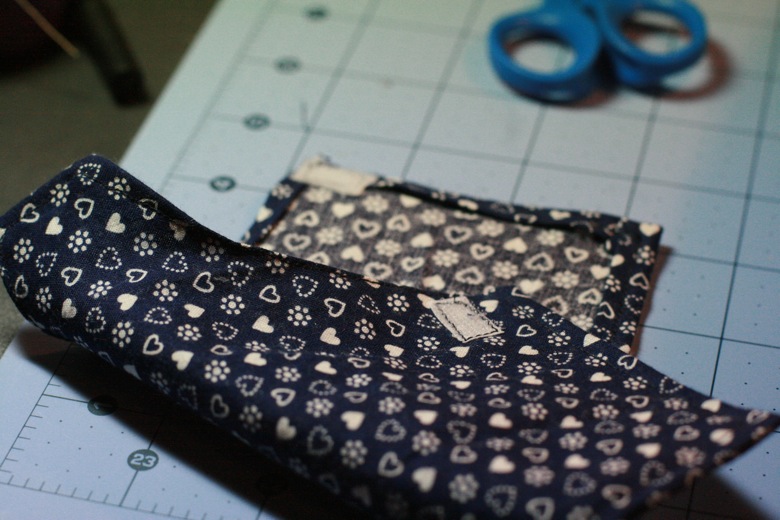
Ta-da! Star's not just in her underwear and fishnets anymore.
(Mikko named her Star because she has a star on her shirt. He's good at naming like that.)
Halter dress
Supplies
- Small piece of fabric — I used a standard-weave cotton, which is easy to sew. You can use whatever as long as you know how to sew it!
- Small fastener of some sort — I used sew-on Velcro hook-and-loop tape.
- Coordinating thread
- Ribbon or other closure
- Fray-stopping glue or other fray blocking supply (optional)
How-to
Remember to wash, dry, and press your fabric before starting.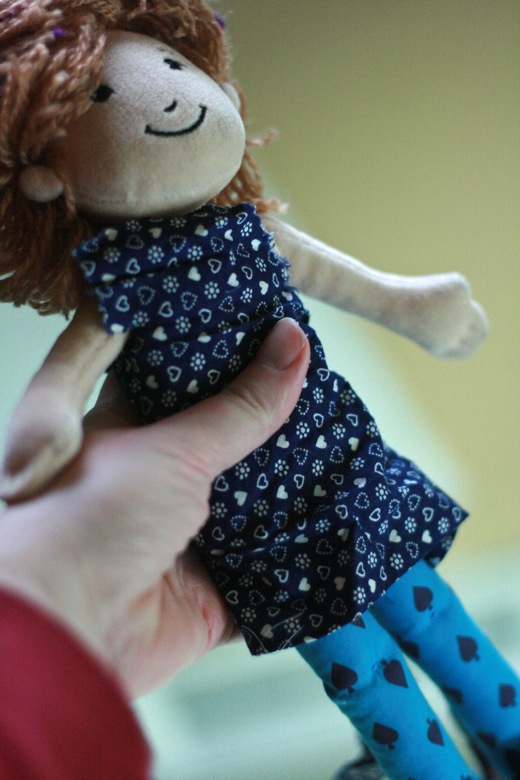
Wrap your fabric around your doll. Allow approximately an extra half-inch of length at the bottom for hemming, an extra half-inch at the top for folding over the halter, and two extra inches for the width to wrap around. (See above for my poor judgment when it comes to measuring. Just, in general, aim too large rather than too small, since you can always make it smaller.)
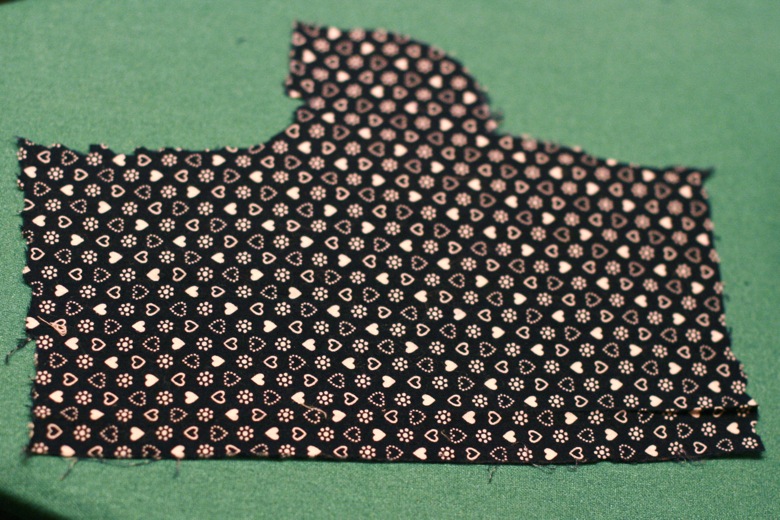
This is what the basic pattern for my halter dress looks like. I have to admit to cheating in that I had a weirdly cut scrap of fabric that already looked mostly like this. Basically, what you want is a rectangle that has a smaller rectangular or square shape in the middle at the top, which will be the bodice. Use your doll to help you figure out where to stop and start the bodice fabric — armpits to neck in height, and as wide as the doll's chest — and remember to allow leeway on top and sides for hemming.
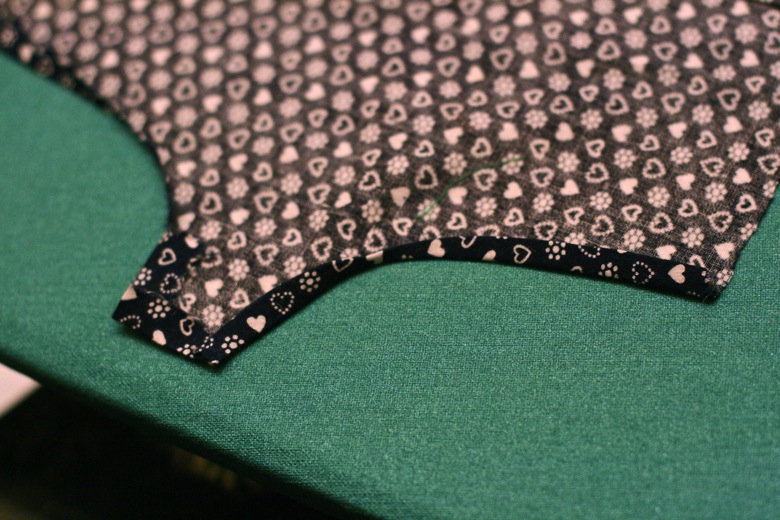
Fold over each edge of your fabric and press. You'll likely have to do it in stages as you roll around the edges of the bodice. Just take it slowly and it should work out.
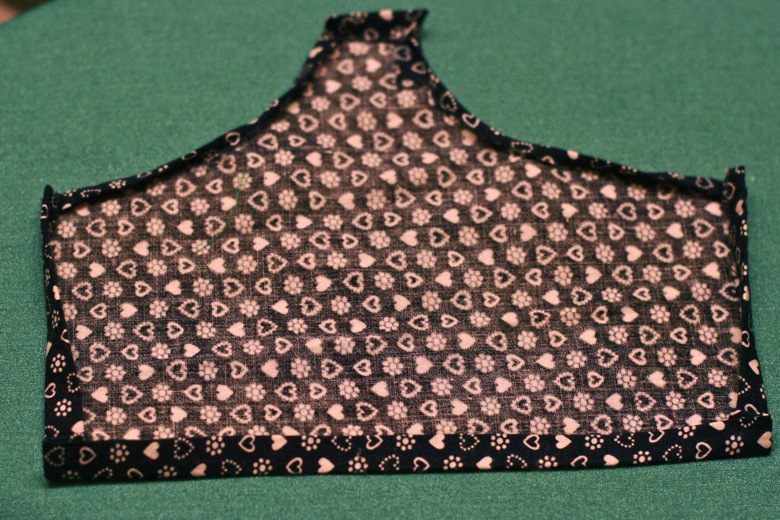
Fold over and press each edge a second time to hide the raw edges. Straight stitch along all the edges.
Sew one side of your hook-and-loop tape to the top edge of your skirt, on the reverse side of the fabric. Put the dress on and wrap the skirt tautly around to find out where the other piece of tape should go.
Sew the second piece of tape to the top side of the fabric wherever that lines up.
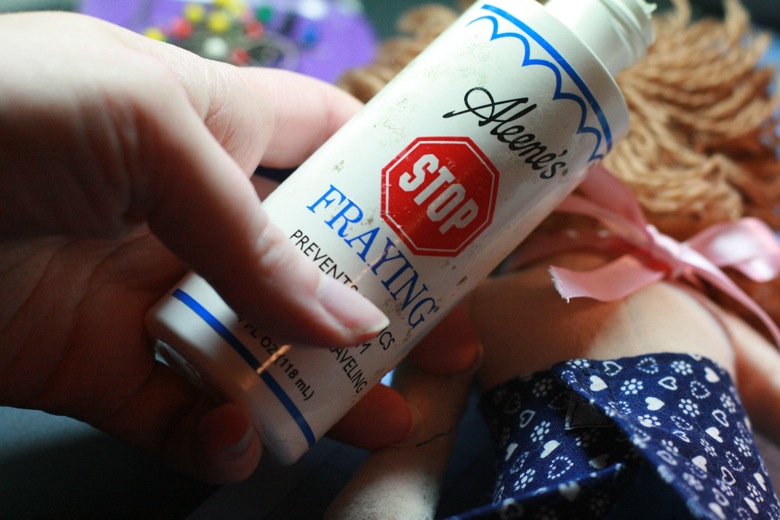
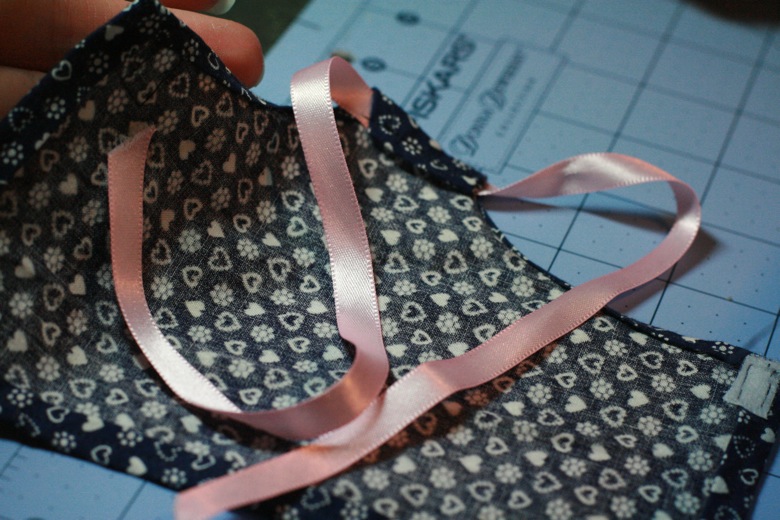
Pick out a coordinating or contrasting ribbon or other closure for the halter. (Yarn, embroidery floss, fabric bias tape, rick-rack — your call!) Measure it by tying it around your doll's neck with the center at bodice height. If your ribbon is likely to fray, or if you even think it might be, do something to the ends to keep it whole. Otherwise, and ask me how I know this, your preschooler will soon be playing with a puddle of threads instead of a skirt closure. I dabbed a bit of Aleene's Stop Fraying
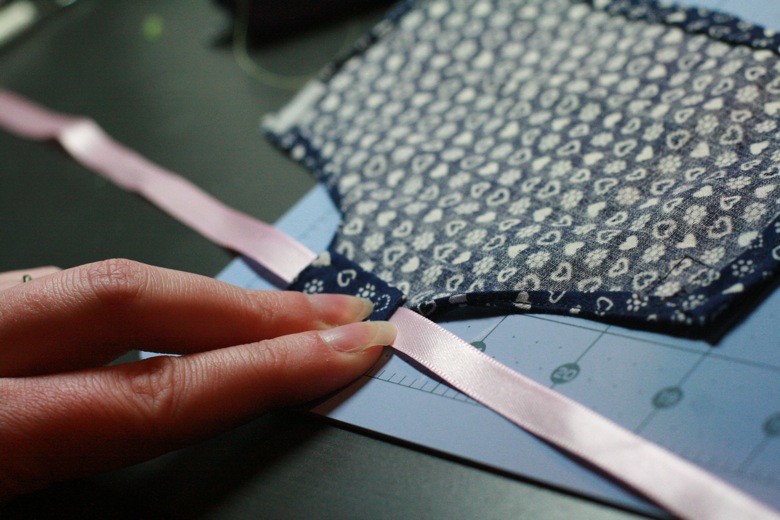
Find the center of your ribbon and place it face down on the center back of your halter. Fold the top edge over the ribbon and stitch. If you want to keep it secure for little hands who will likely otherwise lose the ribbon (raises Mikko's hand for him), stitch right over the ribbon. If you want to be fancy and allow swapping out of different colored ties, stitch underneath the ribbon, leaving a little hollow tube that the ribbon threads through.
All done!
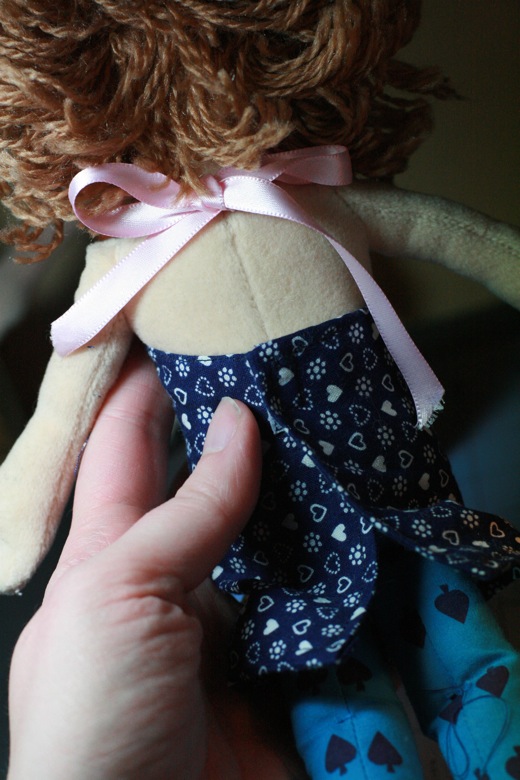
Tied up in back.
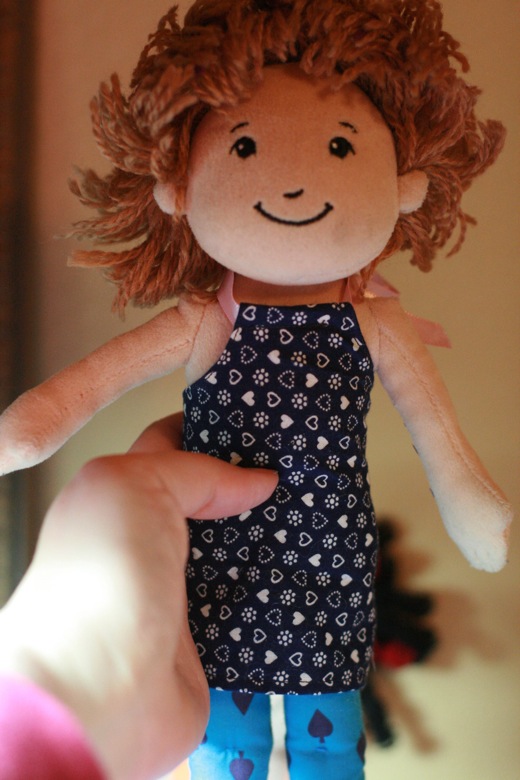
One reason we got this doll is that she looks a lot like Mikko, don't you think? We were going to cut her hair and call her a boy, but Mikko insisted she was a girl. So I named her Cori, since he probably would have named her Star, too, just to keep things simple. She's looking dapper now, don't you think?
If you want to embellish either the skirt or dress, here are some ideas:
- Simple square front pocket in a contrasting fabric
- Band of ribbon or rick-rack along the bottom hem
- Design made with fabric glue (easy) or embroidery (requires slightly more talent)
Hope these how-tos help as you spread holly, dolly cheer!


 I'm Lauren Wayne, writer and natural parent. I embrace attached parenting with an emphasis toward green living.


4 comments:
This is exactly what I wanted to do for iris for Christmas and didn't know how! Thank God for you! M
With polyester ribbon you can burn the edges with a match or lighter (and once in desperation, with the pilot light on the stove). I prefer that over fray check, but possibly just because I keep forgetting I have it, or spilling it.
We've done some similar sewing for Groovy Girls specifically. The wrap around skirt is easy to make reversible too. Once when I didn't feel like sewing, we cut holes in and trimmed some decorative socks from the mismatch/holey sock bag. My daughter was three at the time. She's five now and one of those sock "sweater dresses" is still one of her Groovy Girl favorites.
Fun! I enjoyed reading & seeing your creations. =)
Post a Comment