
 I have a project for you that you can whip up in plenty of time for a Christmas present — or just as a comfy addition to your own living room so you can keep the heat turned low. It can also work as a baby blanket, particularly for winter babies.
 It's easy, it looks lovely, and it feels even better that that.
When Mikko was a baby, my aunt and uncle visited and brought a cozy blanket my aunt had made. Even with all the many blankets we received, it's still one of our absolute favorites. It's a soft ducky flannel on one side and a plush fuzzy fabric on the other, with padding inside to make it extra fluffy. When I wrote my article about not wearing jackets in car seats and recommended a plush blanket instead, the ducky blanket was the one I was thinking of, and I was wishing everyone had one so cozy!
 Well, now you can. Because I got to thinking, it would be so nice to keep the duck blanket in the car for use in the car seat and stroller but then have a duplicate at home for snuggling on the couch or tossing over a sleeping little one in bed (when said little one will not sleep under the covers like a normal human). And as long as I was making one for use at home, I might as well make it match our living room decor!
So I toddled off to Jo-Ann's and found flannel and plush fabrics on sale (score!), plus some batting and thread. If you already have some of these materials at home, you're ahead of the game.
Here's the how-to:
What you'll need:
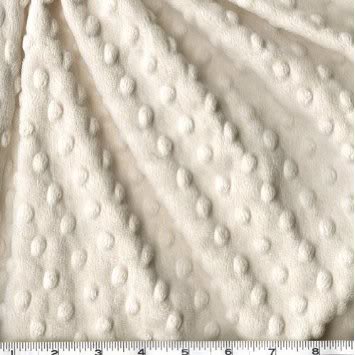
Pictures here are just illustrations for what you could get, not what I actually did get.- Batting: craft size or crib size. Mine was crib size, 45" x 60", dimensions I

thought perfect for a throw or lap blanket. It covers your legs and can be shared between two people (e.g., Mama and tot) but isn't too bulky to toss over the back of the couch. A blanket made for a baby will probably be smaller (the duck blanket is), so probably craft size. I was tempted to buy a larger size batting (say, twin size) before I remembered the fabric would be narrower than that and would then have to be pieced together or quilted — way too much work! So the biggest

you'll want your batting to be is around 45" x 60", and you can go smaller if you prefer. For this project, I highly recommend getting the batting that's a full blanket rather than loose stuffing, and feel around for the texture you prefer. I chose a low-loft in 100% pre-shrunk cotton, because it felt so much better than the polyester versions I squeezed, but it was a little more expensive. If you're not in a hurry, it can pay to wait around for each item to go on sale in turn. You could also use fleece or something comfy you already have around the house, as long as it's big enough for your purposes.
- Flannel, in your preferred pattern and color. I chose an elegant floral design with

muted greens, blues, and browns to match our living room. Or, more precisely, to match the living room we hope to have when we get around to decorating it. If this is for a baby, go for duckies! They're a hit. For yardage, look at the width of the flannel and at the dimensions of the batting.

For instance, my flannel was 42" wide, so I decided to make my blanket 42" wide (a little smaller than the batting's 45") and then needed to get 60" of the flannel, which is to say, 5 feet, or 1 and 2/3 yards. Not 5 yards, as I mistakenly calculated when I was standing in line amid the chaos of a closing store, with a three-year-old pulling bolts of fabric off shelves to drag around on the ground and ripping patterns out of drawers. Take the time to think, if you can…
- Plush fabric for the back. There's usually a special section of "Soft & Comfy"
fabric at the store. The fabrics there are generally a soft and squishy 100% polyester and are an assortment of fluffy, shaggy, stripes, and minky dots. Choose your favorite that coordinates with your flannel. I picked a white stripe, much to Mikko's dismay, because he was insisting on the
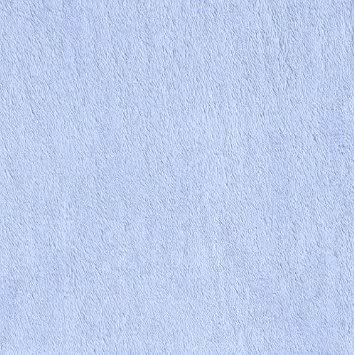
yellow. For yardage, look at the width of the fabric and dimensions of your batting again. My plush fabric was 58" wide, so I decided to make that the length of my blanket (trimming a little of my 60" of batting), which meant I needed 45" for the width, or a little less than 4 feet of fabric. Did I get 4 feet? No, I got 4 yards, of course. But what I meant was 1 and 1/3 yards. (I will be making two more identical blankets for gifts, so it won't go to waste!) Adjust your yardage for your batting size, but do the math right if at all possible. Note that if, for some reason, your plush fabric is heavily directional (like, if it has a print on it or you want the stripes running up and down instead of sideways), you'll have to ignore and trim the extra width and just buy the same length as the flannel. I was trying (in a careless way) to be thrifty by taking advantage of the plush fabric's extra width and turning it sideways to match the batting's length instead.
- Thread. That's pretty obvious, and you likely already have some to match, but if not, grab some. It's not a super-structural piece, so any old normal kind will do.
Putting it together:
This blanket is so ludicrously easy that there's no reason that I should have taken all these photographs and outlined the steps so thoroughly. That was just to make it look more complex or something. Start to finish, not including the disastrous shopping experience and prewashing the fabric, this blanket took me two hours max, and I'm not that good a sewer. I mean, I don't want to put myself down and say a monkey could do this, but if the banana fits… So if you're in this scenario — "What? The holiday party [or baby shower] is tomorrow and we're supposed to bring a gift?" — you can totally do a dash to your sewing machine and stitch one of these up in a jiffy.1. Wash your flannel and plush fabrics the way you'll continue to launder them after they're sewn together. Flannel especially tends to shrink in the dryer, so if you want your blanket to be machine washable, go ahead and give the fabrics a good wash and dry in advance. Don't skip this step, or the flannel will shrink more than the polyester once the blanket's sewn, and it will pull at the stitches.
You'll lose some sides to your flannel due to unraveling; if that bothers you (or you have limited yardage; I had three times as much as I needed, heh), you can try to keep it to a minimum: Snip 1/4 inch off the raw corners (that's the easy method), wash it inside a mesh laundry bag
Some batting needs to be pre-soaked to shrink to its final size. I chose a pre-shrunk cotton for ease of use. Check the label and see what yours says.
2. As I mentioned, my flannel was 42" across and let's say 60" long (once I'd trimmed it…), and my plush fabric was 58" wide and 45-ish inches long. The batting was 45" x 60". So I picked a corner to line up all three layers in their final dimensions and trim the excess. I ended up with a square of each — flannel, plush, and batting — that was about 42" x 58". It was a little tricky to lay the flannel and plush perpendicular to each other, so I did the trimming in stages with plenty of measuring as I went. It also included trimming down the batting some. If your flannel is the same width as your plush, this step will be easier, but it wasn't particularly hard — just kind of cumbersome. Don't worry if it's off a little, though, or you trim more than you'd intended. It's a blanket, not a form-fitting fashion gown.

3. Ok, so you have your layers cut. Now line them up in this order: batting, flannel fabric in the middle with right side facing up, then plush fabric on top with right side facing down. In other words, your two fashion fabrics will be right sides to each other, with your batting making up a bottom layer. Pin everything together.

4. Sew a straight stitch around the whole rectangle, except for a small gap (maybe 4-5 inches wide) for turning. I used about a 1/2-inch seam, to make sure I caught all three layers as I sewed. If there are any places where one layer or another is smaller than you'd intended, make sure to use a seam allowance on that side that catches them all. If you secure your batting at the edges like this, you won't have any need to quilt or tack it throughout the center once the blanket's done.

This is about the size hole you should have left unstitched. (This picture was taken after turning and is just to show you.)

Why did I take a picture of the seam? I don't know. Moving on.

5. Trim the excess from beyond the seam so it's not a bulky edge within the blanket.

6. I tried it with and without pressing the seams open, and I preferred pressing. I'm not a big ironing fan myself and tend to skip steps like this. I bought my iron for college, and it's seen maybe half a dozen uses over the years. I don't even have a proper ironing board, just this countertop one. But, like I said, I tried it both ways and pressing looked and felt better once it was turned. So press your seams open and flat, or don't come complaining to me.

7. You left a hole like I said, right? Of course, you did. You probably also know the difference between feet and yards. Turn that sucker right side out.

8. Make sure you poke your fingers into the corners to make them into nice triangles. Take time out to do a little sock puppet show to amuse yourself.

9. Now you have a couple options for finishing.
- You can hand stitch the hole closed, using an invisible slip stitch (something like this). Basically, just try to keep the bulk of your thread down in the fold and do only teensy stitches on top of the fabric on one side.
- Or, if you prefer a flatter, more polished look to your blanket (and you used a low-loft batting), you could alternatively fold the raw edges of the gap under. Press all the edges around the blanket to make sure they're lined up and flat, and pin the opening closed. Then topstitch close to the edge around the entire blanket, which will seal the hole while giving a finished look to your piece. (Here's an example of what it might look like if you did two decorative lines of stitching.) I apparently prefer a
sloppiermore organic look.

10. Ta da! Toss that throw.
Seriously, did this tutorial need this many words? I could have just posted a photo of the ducky blanket and said, "Make like picture." But it was fun for me to feel useful.
Now go snuggle with someone special, or give away your creation to a worthy recipient. I have to do something with my two extras, so some friends will be getting them soon!


 I'm Lauren Wayne, writer and natural parent. I embrace attached parenting with an emphasis toward green living.


12 comments:
This is so cute and the perfect kick in the butt I needed to get back in my sewing groove. Just in time for wintery weather!
I just have to say that while what I was looking for a quick and easy throw pattern - got, it! Thanks! - I was also pleased to be entertained by your wit. Nicely done, and, yes, you have been immensely helpful today! :)
That blanket looks so cuddly. I have to make one of these! Looks like my fabric store coupons will come in handy. Also, I have some old, large wool blankets that aren't nice-looking anymore but are very warm and I could totally cut those to use for the middle layer instead of batting! So glad to have finally found something I can use them for. Thanks for the idea.
So, I was thinking of doing this for a secret santa gift. How much did you spend on it? Roughly of course. Since you bought 3 times the amount. I love it. It's beautiful and looks simple. I only hope I have basic knowledge of a sewing machine to make it. :)
@Unknown: Let me try to tally it up based on current prices at JoAnn.com.
Batting: ~$12 regularly for crib-size cotton batting. No one sees this, so you could recycle fleece or wool you have already, like old blankets. Or you could use a 40% off coupon to bring it down to $7.20.
Flannel: $7/yd on sale for $3.49; 1.75 (making my life easier) yards = $6.11.
Minky: $14.99 regularly per yard; 1.25 yards = $18.74. With a 40% off coupon, $11.24.
Thread: Nothing special or matchy-matchy needed, and you can continue to use it after you gift, so I'm not counting this.
I always use coupons at JoAnn's and try to get things on sale. You can usually hit more than one item on sale then use the coupon(s) for the things that aren't. Getting at least 40% off each of three items is regularly doable; often sales will be for more like 50% or 60% off and the fliers always have at least a 40% coupon. The sales change weekly, so check back, and be sure to sign up at the counter for the mailing list to get the coupons.
If you were in a super rush and couldn't wait for further sales and coupons, the above total would be $36.85 if you bought it all new today. But if you hit all the coupons/sales, new could easily be more like $24.55, or $17.35 if you recycled the batting.
Hope that helps!
I love that after doing a lot of searching for a pattern I stumble across your site! You have helped me with soo much!
Hysterical!! And super helpful!!
I have made many baby blankets in the very same way. So easy to do. I also tie the blanket with cotton thread. I go through all layers and tie a small knot and cut off the excess thread. This helps keep the blanket from separating from each layer. I loved reading your instructions on making your blankets. Thank you for the directions!
I am enthused to make one primarily because of your engaging and attention grabbing instructions along with results of experiences.
Love your voice too.
Thank you! Thank you! Thank you!
After hours of searching I finally stumbled upon your wonderful blog! It's so helpful, yet simply and easily explained. I bought supplies to make a Star Wars blanket for my little Star Wars enthusiast; but I don't have much experience sewing with minty type fabrics.
I can't wait to get started.
Thank you for all the helpful tips!
Just made my wife one of these! A few mistakes cutting and assembling turned a queen size into more like a princess size but it's great, warm and she loves it. Thanks!
Thank you so much for this easy tutorial! My granddaughters were here visiting from India. Their dad is there for work. They have never been to Hobby lobby before and I told them they could get what they wanted for their birthdays. My oldest granddaughter who is determined to learn to sew asked if she could get fabric for a blanket! So here I am making a blanket for her and let her do some hand sewing on it. I’m sure with your easy tutorial it will look beautiful!
Post a Comment