
 The mei tai baby carrier goes to Betsy B. Honest at Honest 2 Betsy!
Betsy is one of the funniest bloggers I know, and she has a guest post coming soon on her birth experiences — specifically, the pain part of birthing! It's beautiful and hilarious and...oh! Stay tuned!
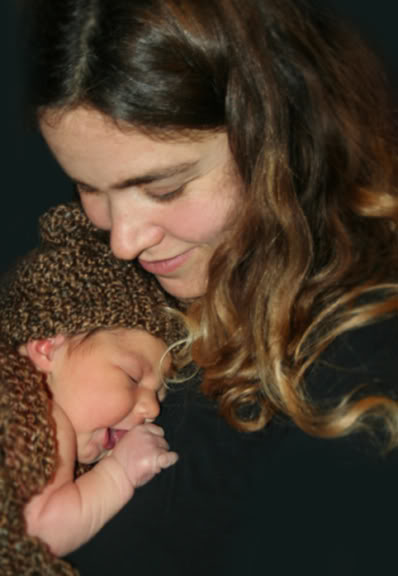
The picture is of Betsy and her newest little one, Josephine, born only a week ago and who will get to pioneer the wrap.
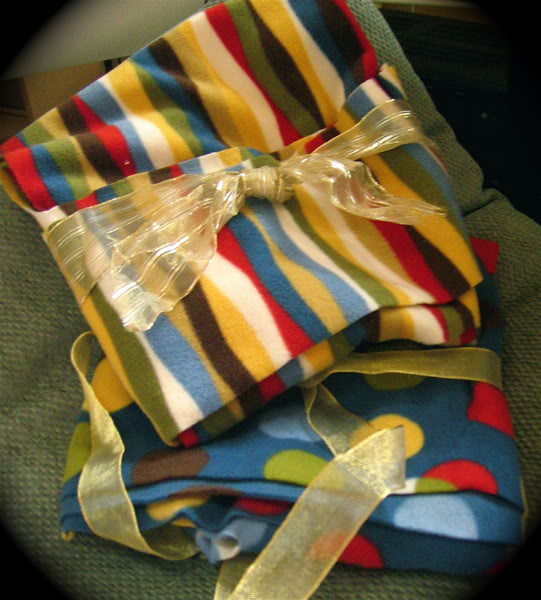 Betsy has chosen the polka dots, so I'm not promising, but you might see the stripey one make a reappearance sometime.
I was so overwhelmed by all of you marvelous people and your wonderful entries. So many much-loved babies and toddlers out there!
For those of you who didn't win (that is, all of the rest of you!), I will just point out again that you can make your own no-sew fleece mei tai. Whether you can get around to it is up to you, of course!
My handy-dandy mei tai how-to packet can help! I'm repeating the pattern and no-sew instructions below. The document (it's a PDF via Google Docs) also includes a sheet on how to wear your baby in a mei tai, perfect for your own use or for handing out to friends.
For those of you who have been wondering why on earth it was taking me so long to announce the winner of the giveaway, wonder no longer! It's because I was trying to create the pattern you will see below in Photoshop (which is only on Sam's laptop, so I had to borrow it while he was sleeping!), which involved much measuring and math and then measuring again and shaking my head at myself and measuring again, and then I had to expand my handy-dandy instruction sheet to include my new pattern and how-to, and then upload it and do a test print (also only on Sam's computer, because mine deciding printing is beneath its dignity), so...well, it all takes time. But it's Thanksgiving today hereabouts, so let's all be thankful for babywearing! Yea!
The original pattern and instructions are from WearYourBaby.com, and then I made a few alterations.
The tricky part's making the first one. After that, you can use that one to trace around and make more if you'd like to give them as baby gifts. Make sure to include the first two pages of the mei tai instruction packet so your recipients know what to do with their new homemade-with-love fleece baby carrier!
What you need: 2 yards heavy fleece, in your choice of colors, patterns, or embellishments; measuring tape; chalk or marker that will show on your fleece; pins; sharp scissors (if yours are dull from cutting paper, buy new ones or get yours sharpened — dull scissors will just frustrate you and slow you down — ask me how I know this!)
Where to find fleece: Any fabric store, or in the fabric section of a mega-store. At JoAnn's, it often goes on sale, so you can wait if you're patient.
The pattern: Some of these instructions I'm copying from WearYourBaby.com, and some I'm adding or altering. You can choose which directions to follow, because it's your carrier, after all!
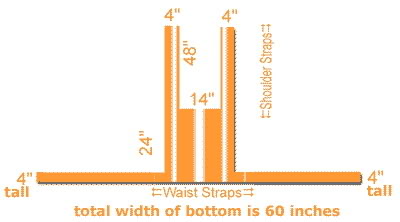
This is the original pattern from WearYourBaby.com, which I happened to download before the domain changed and the image links broke:
Here is my version:
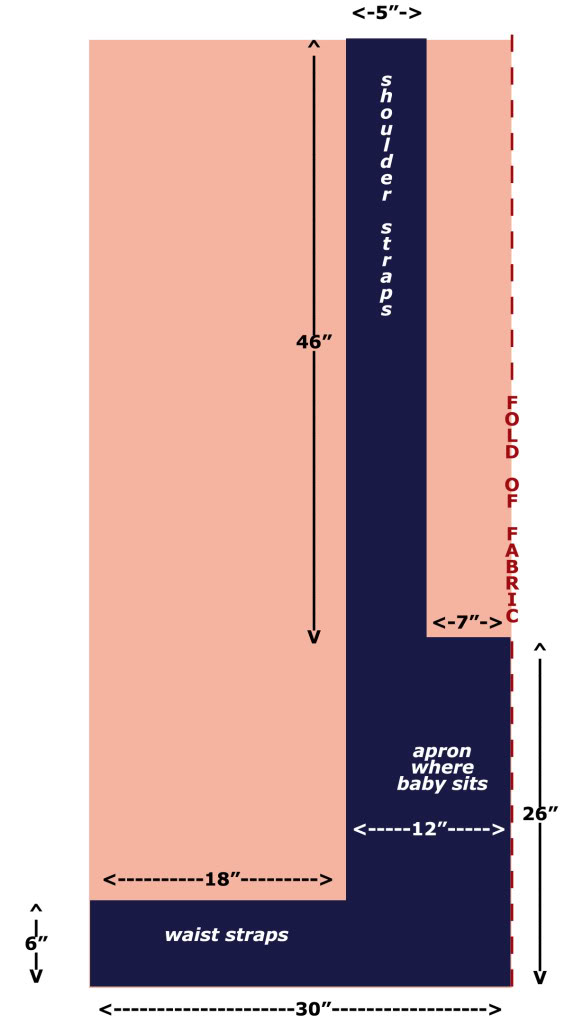
Click on either to see it larger. If you download my handy-dandy instruction packet, my version of the pattern and these instructions are included on the last two pages.
The differences between my pattern and the original are that mine's more to scale (it might not be perfect, but it's free, so why complain...), which makes it easier to visualize as you measure. I also made my straps wider for comfort's sake, and the apron where the baby sits a bit higher. My baby's got a long torso, and I felt like the original length was a little short on him. If you have a teeny baby, you can either (a) cut the apron shorter as in the original pattern or (b) roll up the waist a little (easy solution, and it keeps the length for when you might need it later). What's nice about the longer length is it can double as a makeshift sleeping hood/support for a small and drowsy baby's head.
If you want to use the original WearYourBaby pattern, remember it is not to scale. See how the bottom says "total width of bottom is 60 inches"? But the total length is 72 inches, which, you know, should look longer than the 60 inches. So don't let that confuse you. Also, you fold your fabric in half lengthwise, so imagine folding the mei tai pattern in half as well. If this is too confusing to you, just use my version!
Simple step by step:
• The fleece you start with should be 2 yards long (72 inches). The width will vary depending on the bolt of fabric but should be around 60 inches wide. If it's less, don't panic. Just see if the width will fit around your waist comfortably and allow you room to tie the straps in a knot. Probably it will.
• Fold the cloth in half lengthwise so that the length is still 2 yards but the width is now about 30 inches. Smooth it out and pin it in a few places if you're concerned it will shift.
• In my version of the pattern, the light rectangle is your folded fabric, with the dotted red line showing where the lengthwise fold is. The dark blue is what your finished mei tai will be (folded in half). You cut off all the light parts and save for scraps or discard. (This is kind of a wasteful pattern, but that’s the trade-off of no-sew bliss!)
• Use the measuring tape and your chalk or marker to measure and mark (ah! it makes sense!) the dimensions. (If you use permanent ink, make sure you cut inside the lines so that the marks aren't on the finished mei tai.)
• I’ve widened the straps somewhat to make them more comfortable. You can make the shoulder straps even wider, but I would gradually increase the width in a V shape so that the wide straps don’t crowd the baby in the apron part: so, 5” wide where it intersects the apron widening out to 7” or so at the ends. If that doesn’t make sense to you, ignore me and make like picture.
• Cut along the lines you’ve marked with sharp scissors. If you're having trouble cutting through the two layers of heavy fleece, it's because you didn't believe me on the sharp part. The lines don’t have to be perfectly straight. Don’t cut along the fold, or you’ll have two half-tais! You can trim off any selvage (ugly bits with writing along the edge).
• Unpin & try it out with your baby, if you have one handy. Adjust as necessary.
• Bonus: If you like simple sewing, experiment with adding a pocket from some of your scraps!
Finished dimensions: In my version, the waist straps should be about 6 inches tall and about 60 inches wide. The shoulder straps should be about 5 inches wide and about 2 yards (72 inches) tall. The apron part should be about 24 inches wide (including the two 5 inch shoulder straps) and 26 inches tall (including the waist strap). If you use the WearYourBaby version, here are the dimensions instead: waist straps 4 inches by 60 inches; shoulder straps 4 inches by 2 yards; apron 22 inches wide by 24 inches tall.
For a printable version of this pattern and construction how-to, click on Hobo Mama's handy-dandy mei tai instruction packet to download a PDF version from Google Docs. It's four pages long but can be printed back to front if you'd like a paper-conserving way to hand out the first two instructional pages to friends when you're giving away mei tais as baby gifts. I even included super-cool pictures of a fleece mei tai in use! And it's designed in Word, so you know that's got to be snazzy.
For more ideas on how to wear and how to make Asian-style baby carriers, see my post on "Babywearing the heavy baby: mei tai."
Please let me know if there are any broken links, bad math, faulty measurements, or general incompetencies in my pattern making. This was my first attempt at making a pattern, and I tend to adapt things for use with my (huge) baby, which might or might not be as useful for other (size) babies. So I'd appreciate your (gentle, oh, please) feedback.
Once again, I just want to say that I so appreciated all of your entries into the giveaway and wish I had a mei tai for each of you! I hope you'll stick around so I can get to know you better. Any friend of babywearing is a friend of mine.
Enjoy, and wear your baby!
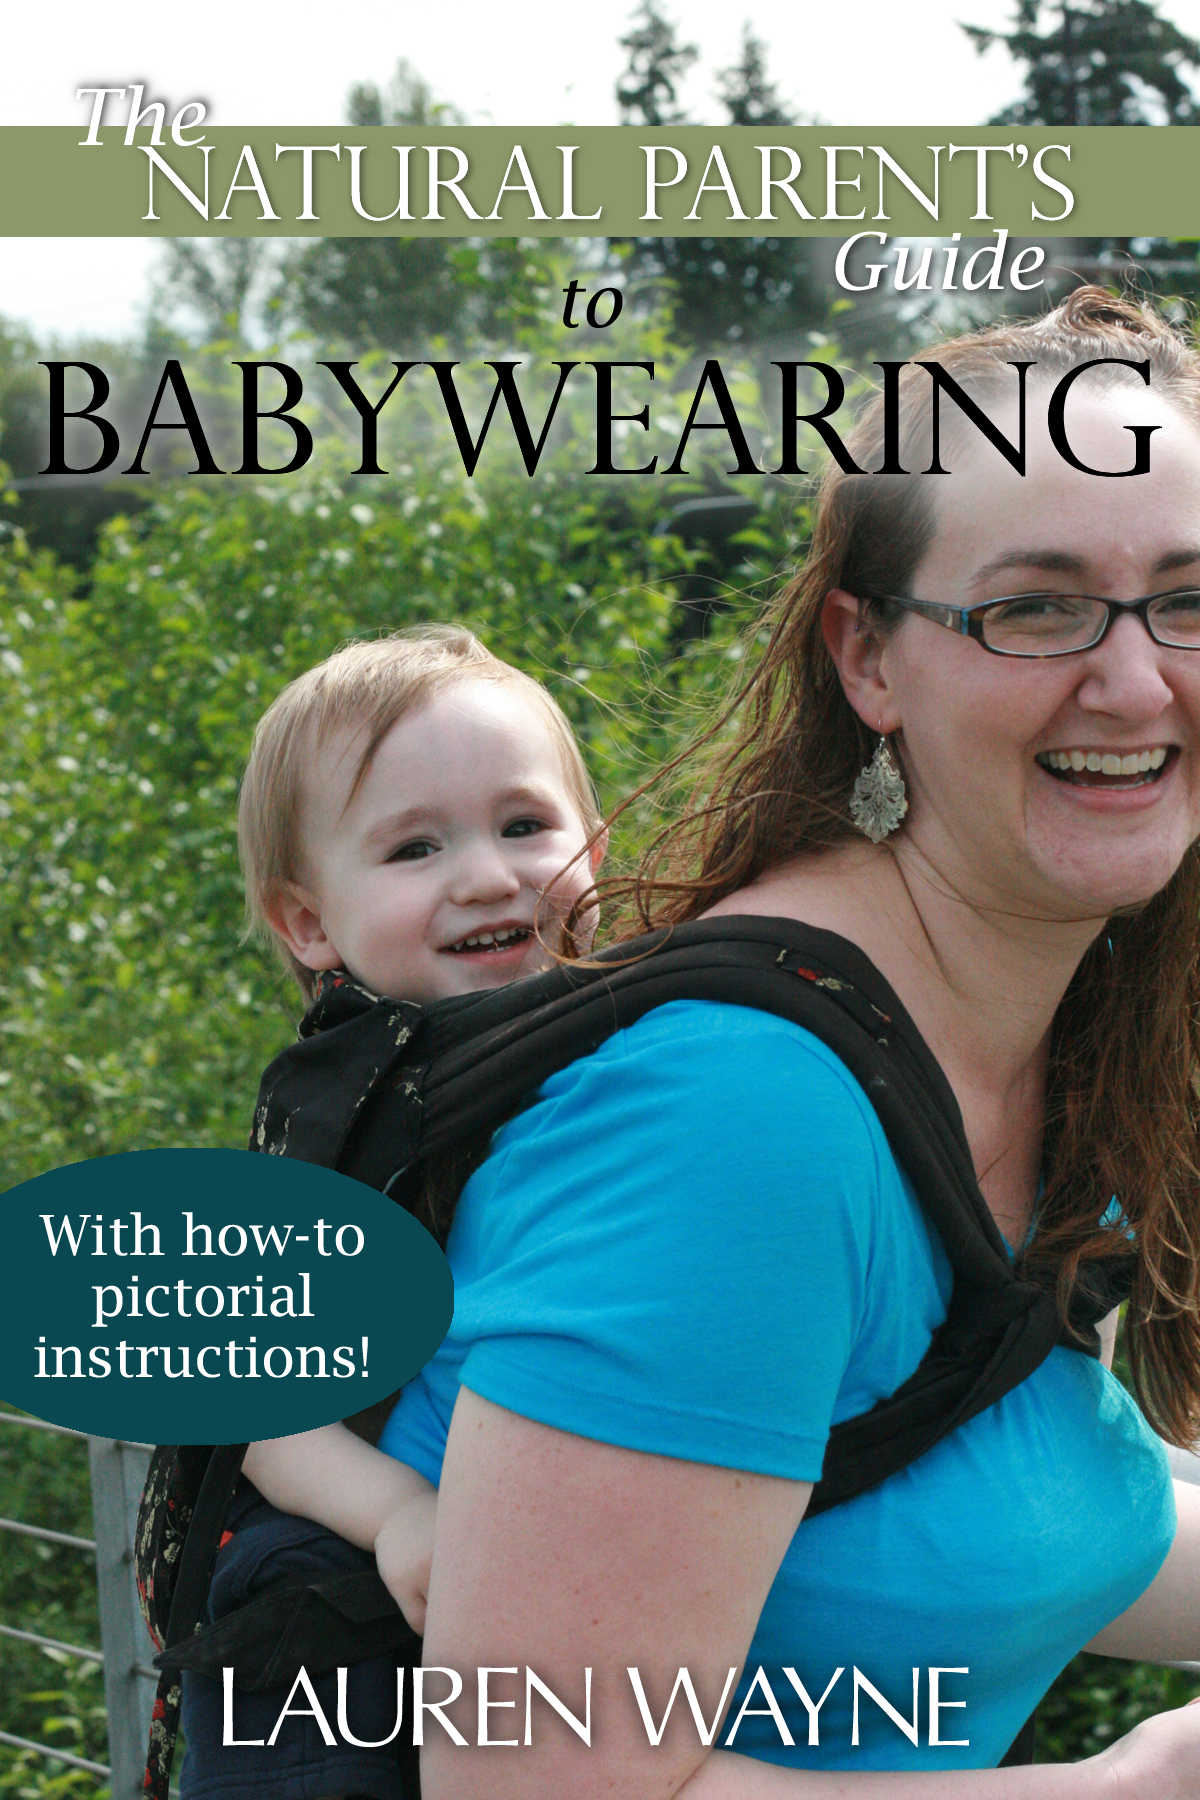
Top photo courtesy Betsy
Mei Tai pattern © www.WearYourBaby.com
with adaptations and sweat labor
by Lauren Wayne (that's me!) from Hobo Mama
Instructions © Lauren (still me!) from Hobo Mama
based on the WearYourBaby instructions,
but feel free to adapt and pass this along
to as many babywearing enthusiasts as you’d like!
Mei Tai pattern © www.WearYourBaby.com
with adaptations and sweat labor
by Lauren Wayne (that's me!) from Hobo Mama
Instructions © Lauren (still me!) from Hobo Mama
based on the WearYourBaby instructions,
but feel free to adapt and pass this along
to as many babywearing enthusiasts as you’d like!


 I'm Lauren Wayne, writer and natural parent. I embrace attached parenting with an emphasis toward green living.


12 comments:
Yay for Betsy! ~Welcome Josephine~
The mei tai was one of my fav carriers.
Yea! Congrats Betsy! Enjoy that beautiful new baby and new carrier! Many blessings!
Nicole
Yipee! Very exciting!
Thank-ya, thank-ya, thanks!
Is there a weight limit you know of for this carrier made out of fleece? I have a 27 pound (toddler) who I still carry and I'd love to make a mei tai like this. Do you think the fleece would hold him?
Don't know if my previous comment went through - I was looking for a weight limit if known on a fleece mei tai like this. Thanks!
Would you use more fabric if you are a plus size Mama? Or is this pretty much a one size fits all sort of thing?
Leslie: I can't give a precise weight limit, since it's a homemade/untested item. All I can say is that we had a VERY heavy baby who reached 30 lbs by 6 months & 35 lbs by a year, and we were still using this with him as a toddler. I personally found it more comfortable to start using the ERGO around 30 lbs, but my husband kept using this fleece mei tai. We never had any signs that it was weakening or breaking. I would choose a fleece that's not super stretchy, and maybe make the straps on the wider side (for comfort, so the weight doesn't make them dig in as much). Then just monitor the fabric — check it before you put it on each time to see if anything looks fishy.
Shannon: The apron I think would be about the same size for every mama, just because that fits the baby more than the person (although I could see a smaller parent and/or smaller baby maybe preferring less fabric). The thing more fabric yardage would afford you is longer shoulder straps. With 2 yards, they're 46" long, so you could see if that's long enough for you by using some string — start at your shoulders and cross them over your front or back and tie them around the other side. The other measurement is the waist strap/apron, which is the width of the fleece, or 60". Again, try tying a string around your waist and see if that dimension is comfortable. That would be the hardest one to make bigger with a no-sew mei tai, because that's just the standard width of fleece bolts of fabric. If you're up for sewing, though, you could make a longer waist strap that you sew on very, very securely. It wouldn't take all that much effort. The nice thing about all the straps is that fleece is relatively stretchy, and you pull them tight anyway, so you're actually getting some extra inches there. I'm plus-size myself, as is my husband and other relatives who used this mei tai, but I know that term covers a swath of people of different sizes, so I'll leave it to every individual to do the measuring.
ok, i'm completely hooked on the mei tai carrier. i made a stack of them, gave one to a friend, keep one in the car, and i'm wearing alice all the time in one. i have a moby wrap, but it is just so much fabric to deal with - this mei tai is much faster. i get at least 5 people coming up to me in the store when i wear her grocery shopping (not much baby wearing around these parts). so the problem is that it is already in the 80's during the day down here and fleece gets a bit too toasty. now what do i do?! i love my fleece mei tais!
@Missy: Well, now, see, this is why I moved away from any place that gets too hot… I will try to help you figure a solution, though. One idea is to cut the body a little narrower and shorter so there's more airflow.
Another idea would be to try a different fabric, like a cotton gauze or even a mesh, though in that case you might have to sew or choose a different type of carrier entirely (a wrap, which as you said is not as fast a tie-on as a mei tai, or ring sling, but you'll need specialized rings). If you wanted to try making a little-sew mei tai out of a different fabric, I'd first make sure the fabric is sturdy enough even though it's lighter-weight, and then maybe you could get away with just hemming it so it doesn't unravel, and then potentially (recommended) reinforcing the straps with a thicker fabric overlay (or underlay) — fleece or heavy canvas. Like, look at this tutorial and ignore everything except how to sew on and reinforce the straps with X-boxes.
Alice is still pretty young, but if you can finagle a high back carry, that might be more cooling as well.
Here's a post I wrote about Hot-weather babywearing: Summer babies in slings that might give you some more ideas. (See the comments there, too.)
Hi Lauren! I made a mei tai per your pattern - with a double layer fleece blanket that was long and wide enough. I'm in a smallish town in Germany and fabric tends to be pricier here - no 50% off Jo-Ann's coupons! So this was a better deal. Plus it is a different color on each side.
My LO is quite a chunk at 5 weeks and I am pretty sure based on my experiments with our Moby, that she is no longer very comfortable froggying her legs in a carrier. However, the body of the mei tai is too wide for legs-out at this point. Are there any workarounds?
Hi again - I wrote about adapting the mei tai for legs out for a little one. I found a youtube video with some ideas - if you roll the bottom over twice, it helps with the height but also makes it possible to 'gather' the body and tie with a shoelace at the desired width.
@JMT: You beat me to an answer! I was trying to remember where I'd read something about what to do when the legs were too short to be outside. I asked on Facebook, and the consensus seems to be (a) wear the legs wrapped around you anyway, even if they're not outside the carrier and not reaching very far, and/or (b) cinch the carrier with a shoelace, scarf, or hair thing (as you discovered). I'd say you could also simply cut the body narrower, but then — you've got your nice blanket for it, and you might want it wider later. Cinching sounds like the way to go!
Love the idea of using a fashionable fleece blanket, by the way! Enjoy your chunky little baby. :)
Post a Comment