
It's not too late to start some seedlings for your summer garden1 (if you live in the northern hemisphere, at any rate). And you can do it successfully with little fuss and expense and not much in the way of special equipment and supplies.
Why start seedlings inside?
Starting seeds indoors is good for warmth-loving plants that wouldn't enjoy an early dip in the cool soils but that need time to grow before it's consistently sunny enough for them to make the transfer outdoors. Many summer vegetables fit this description — tomatoes, peppers, and melons being among the prime examples — as do some annual and perennial flowers. Check the seed packet in question or a planting calendar for your region for guidance on whether and when to start indoors, and when to transplant outside.2If you don't have a traditional garden space available for transplanting, don't worry — there are other options for those of us who are yardless or have green space but not the time to prepare it. Container gardening, for instance, is perfect for small spaces like patios and balconies, as long as the plants get enough sunlight. Some edibles can even be happy staying indoors all year round. Feel free to experiment — all gardening is experimentation, so don't feel bad if some plants don't make it; it's just a learning experience for next year.
Now, couldn't you just buy ready-grown seedlings from the nursery or home improvement store (or, heck, Walmart or Costco)? Yup. And sometimes I do. But here are some reasons to go the seedling route:
- There's such pleasure in starting plants from their tiny beginnings.
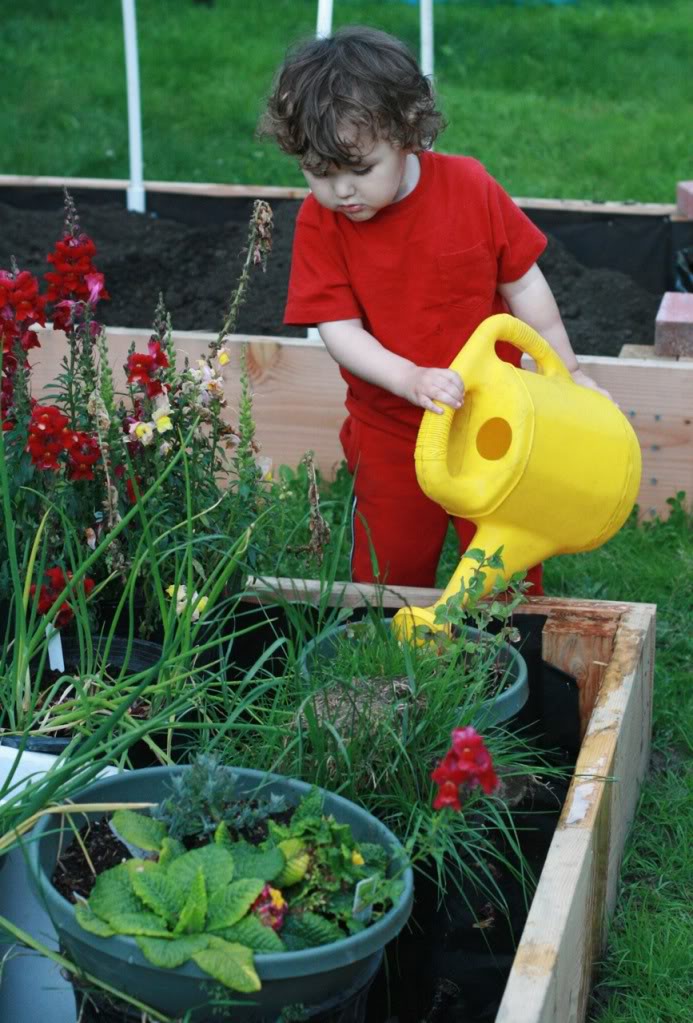
- It's a fun activity to do with children — a little science experiment in your home.
- You have access to a much wider variety of plants from seed than what's commonly available ready-to-plant. You can experiment with heirloom and organic varieties and support small local growers.
- Since the emphasis here is on frugality, starting plants from seeds is cheap, particularly the more years you've been doing it.
So here is how to start seedlings and save some green.
Score some seeds.
Most seeds don't cost very much, honestly. You generally get a whole packet for a couple bucks at the most. But there are ways to be even thriftier.Look around you for a seed exchange. Our local library has a box on a side counter each year where participants can pop a few seeds in an envelope, label it, and then choose from among the other options there. It's a neighborly way of offering variety. If you have a packet of seeds to start with, you could save out the few you'll need that year, divvy up the rest, and walk away with a garden's worth of other options. Look online to see if anyone in your area is offering such an exchange (or start one yourself!), ask your neighbors if they're interested in some one-on-one trades, and check places like craigslist and Freecycle for anyone gifting seeds (or starting equipment) free and clear. There are even freebies to be found from seed companies online or — randomly — on a recent box of Triscuits we bought. Keep your eyes peeled!
Save your seeds. Once you have a season under your belt, harvest seeds from successful plants for next year's crops. It's nature's way of recycling, and it's completely free!
Pick your pots.
We went for convenience with a seed starting kit, but you can use any small containers you have around the home.
As your seedlings grow, some might need more space. Simply transplant them into small pots or flats — ask your nursery for flats or pots they're throwing away, scour your recyclables for suitable containers, or again look on craigslist, Freecycle, or your neighbor's front stoop for discards.
For happy plants, start small and transplant into progressively bigger spaces as needed — check for roots coming out the drainage holes or limp leaves.
Place your pots on a water-tight tray with a lip, such as a repurposed baking pan. You'll want to water your seedlings from the bottom up, letting them soak the water into their roots, rather than drenching their leaves.

Mikko apparently lectures the cling-wrapped seedlings to stay moist and warm.
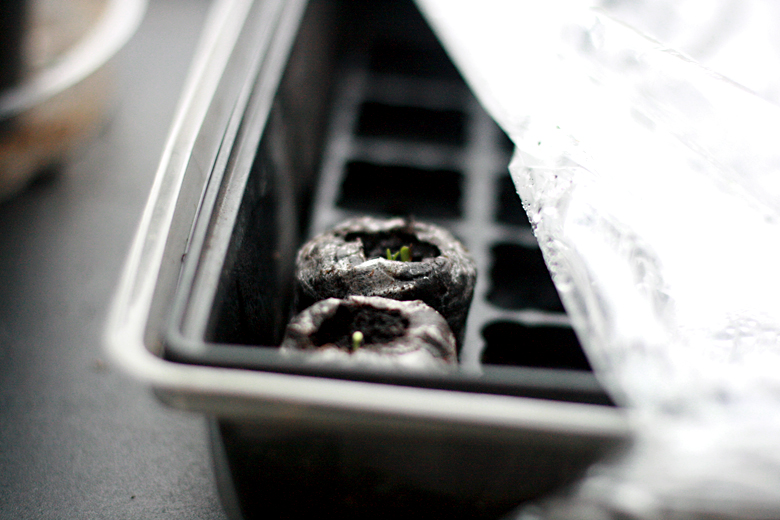
Vent your covering once the seeds begin to sprout, and remove it when they've all popped their heads up.
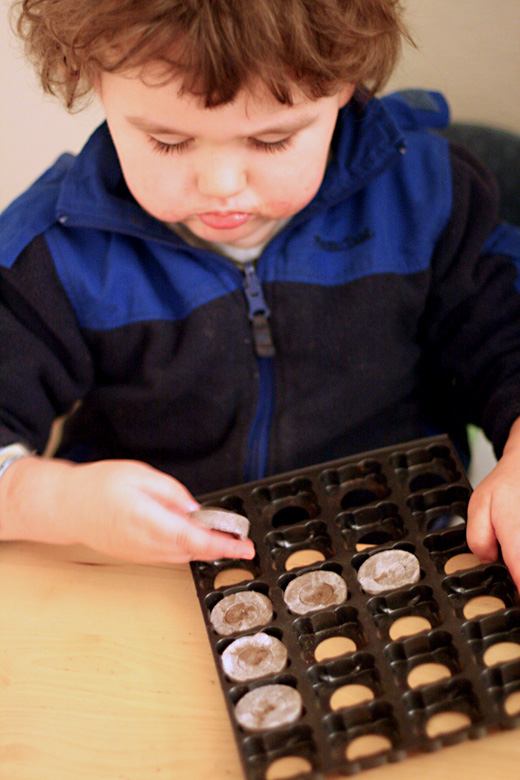
Do the dirty work.
Buy a bag of seed starting mix. Yes, I said buy, but really — a bag of seed starting mix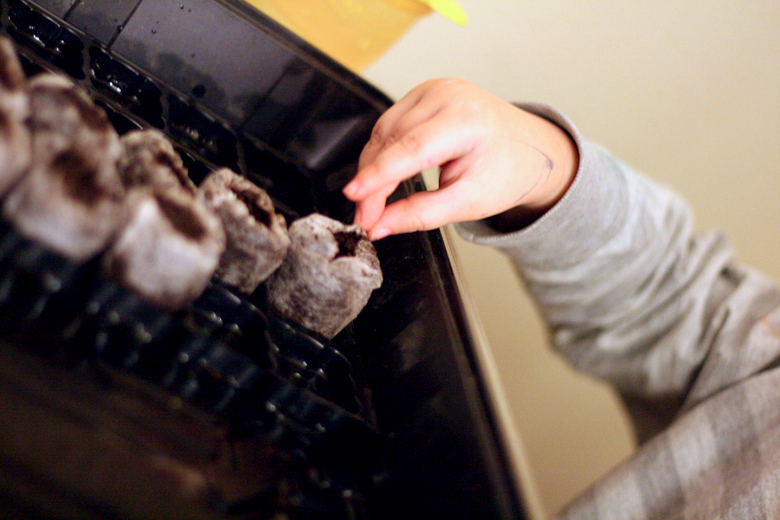
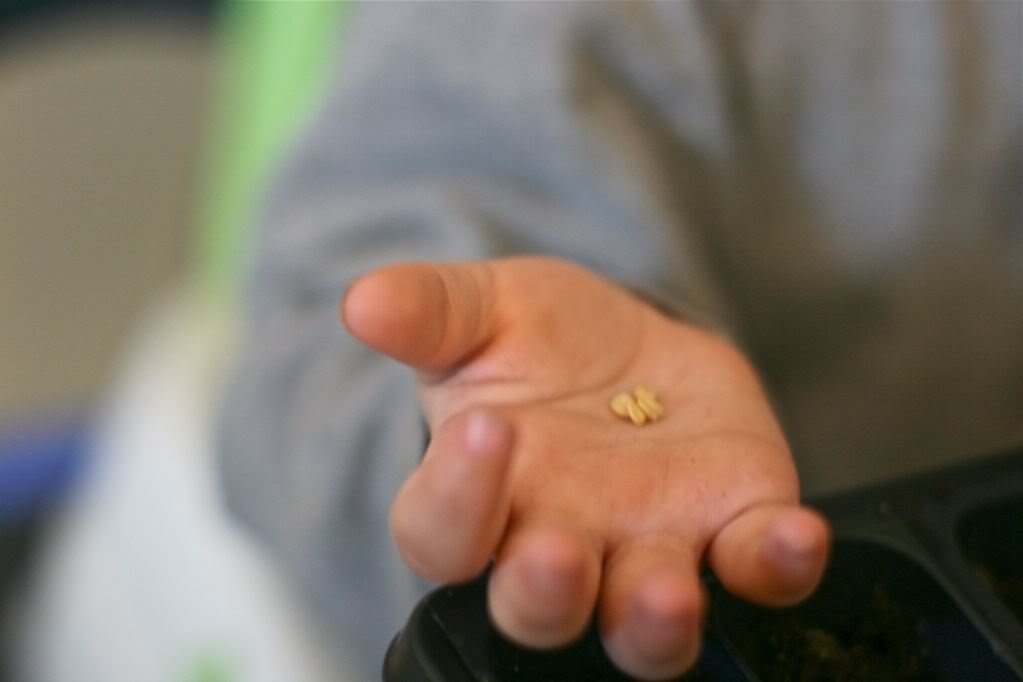
Kids will love helping plant the seeds — it can be easier to scope out the bigger seeds for them and direct them exactly where to set them. If a certain pot is overplanted in their enthusiasm, simply thin seedlings as they grow by pulling out and discarding or potentially transplanting the weaker seedlings.
Make your own soilless seed starter. If you have a lot of seeds to start, it might be more economical to make your own. Look online for "recipes" — most people use some combination of sphagnum peat moss
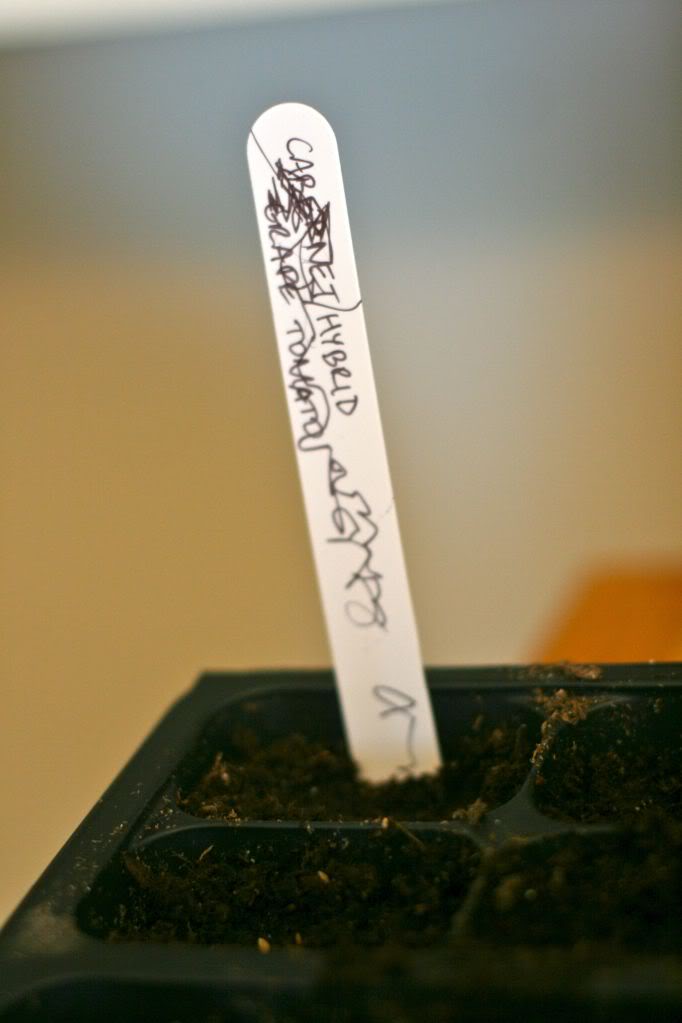
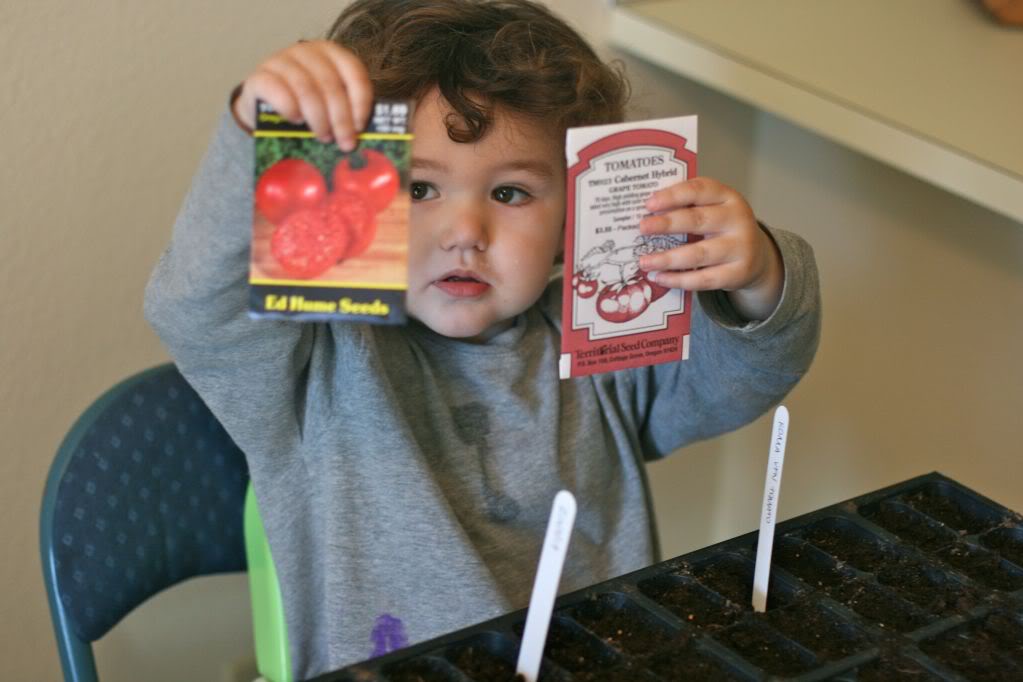
Mark where you've planted which seeds, either in the trays themselves or on a separate chart. You can use recycled popsicle sticks, but either way, I highly recommend having your child help you with the labeling.
Feed your seeds
Once your seedlings' true leaves develop, you'll want to lightly fertilize them. Dilute commercial liquid house-plant fertilizer in water (use 1/4 to 1/2 the recommended amount for a full-grown plant), or look for organic fertilizers like seaweed (kelp) and fish emulsion. You can also make your own cheap and organic fertilizers, such as compost tea, where you dunk compost into water and use that to moisten your seed mix.Practice the water cycle
Plants aren't picky about the water you use. Seedlings simply need to be kept consistently moist but not soggy — if the seed starting mix starts looking at all dry, pour water into the tray and let the seedlings absorb it into their roots through the drainage holes in your containers. A great way to keep your seedlings happy and provide extra nutrients is to repurpose water from home use. For instance, when boiling a pot of pasta, drain the water into your watering can.Let there be light
This is where seed starting can get pricey and cumbersome, but I've figured out a cheap and easy way to give seedlings their needed supplemental light at very little start-up cost, and it's a system that can be used for years to come.Why do seedlings need supplemental light? Even in a sunny window, in most climates, the spring sun is simply too weak to adequately drench your little starts in the brightness they require. The result is weak and spindly plants that are likely to keel over when transplanted outdoors into full summer sun.
There are specialty bulbs and hardware you can buy or make to give your seedlings the sixteen hours of (faux-)daylight they need, but I've tested out my setup for a few years now, and it's been working just fine at a fraction of the cost and hassle.
- Go to your local home improvement store and buy a few clamp lights
. These are cheap little lamps that basically have a tinfoil-like hood, a cord, a place for a bulb, and a clamp. The price is likely cheaper at a local store than online, and shipping these would be iffy, since the hoods could easily get bent out of shape. They're not fancy, and that's the point.
- Buy some compact fluorescent light bulbs marked as "daylight"
in light intensity (look for high lumens). Again, these will likely be cheaper at a brick-and-mortar store, since there are often local government incentives to buy CFLs. Pick the appropriate strength bulb for the clamp lights you purchased.
- Optional but recommended: Buy or borrow a programmable lamp timer
so you can set your lights to go on and off automatically, with an eight-hour break at night to give your seedlings time for some shut-eye. Non-digital models at home improvement stores (and Ikea) start at a few dollars; you can also ask relatives if they have one for vacations they're not using at the moment, or check at thrift stores. If you don't have a timer, you'll have to be diligent about turning on and off the lights to give them at least 14 hours of consistent supplemental light a day, with as much as possible coinciding with daylight hours.
- Find a good location for your plants in a sunny window, if possible. Set up a couple shelves. Your plants go on the bottom shelf, and the clamp lights hang from the top. In our last place, we used a wire utility shelf we had available; in our current location, we have a convenient window ledge already in place.
- Move your plants and the lights close together — only a couple inches from the top of the seedlings to the bottom of the bulbs. (CFLs don't get all that hot, so this is safe for the plants.) This might mean adjusting the shelves or, even easier, propping your tray of seedlings onto a box, some phonebooks (what else are they good for, after all?), or stack of hardcover books (wrap them in plastic first if you care about not ruining them). As your seedlings grow, continue to adjust the shelves or props so the distance stays right around 2-3 inches from the light. Rotate your tray occasionally so the seedlings get equal time closest to the clamps
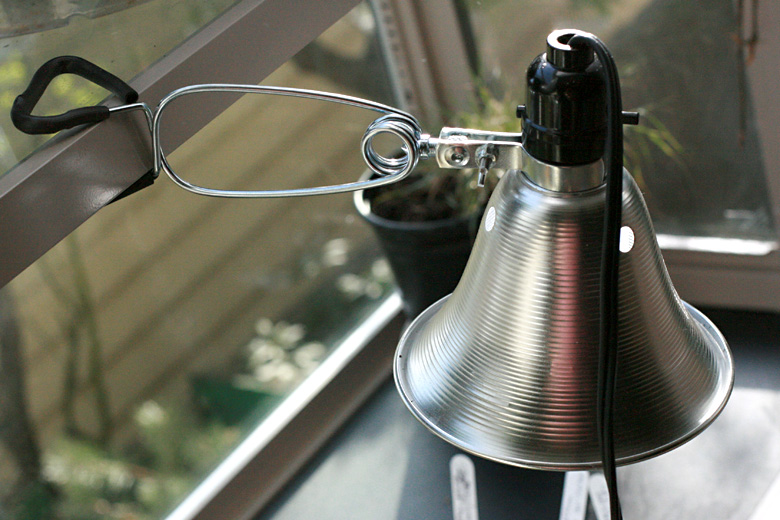 Inexpensive clamp light, found in your local hardware store.
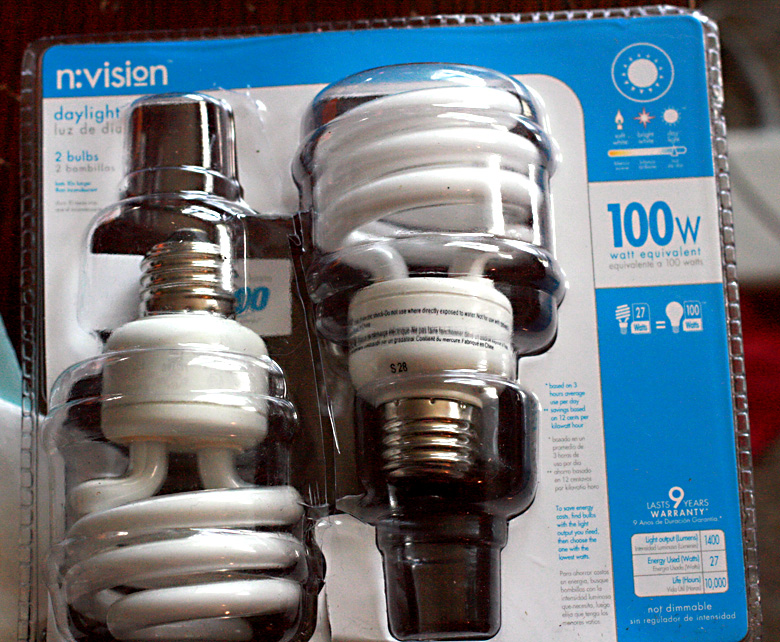 Look for CFL bulbs that promise daylight or sunlight brightness, with high lumens (these promise 1400 lumens). Ignore the mismatched bulbs that I'd placed inside this open pack for storage — this just gives you an idea of the packaging to look for.
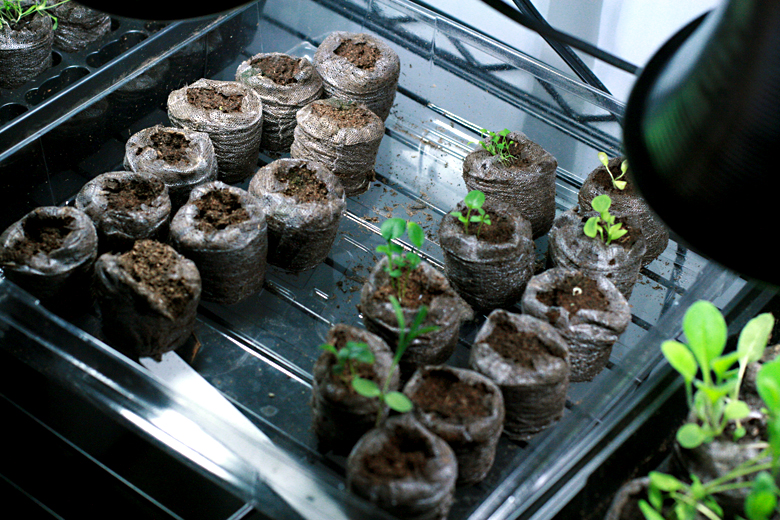 These seedlings are next to a window on a utility shelf with movable shelves.
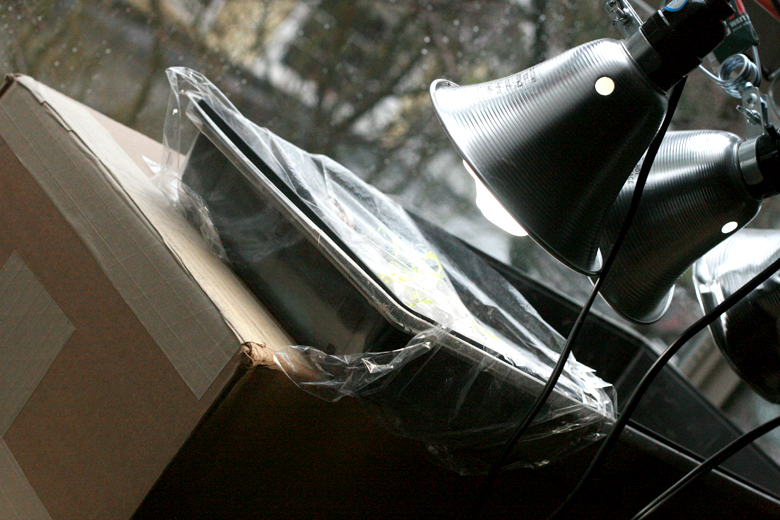 I've propped our flats on a box to be close to the lights. I'll swap it out for a smaller box as the plants grow taller.
You might be able to get some of these supplies used or more cheaply from other people — perhaps someone who's handy has some extra clamp lights, for instance, and cheap shelves are easy enough to beg or borrow.
Make them feel at home in the great indoors
Seedlings like warmth as well, so consider positioning them over or near a baseboard heater or similar heat source rather than buying more expensive germination heat matsTo strengthen seedlings further, fake some wind by having an electric fan blow their way for several hours a day, opening a nearby window on breezy days, or simply ruffling them with your hand whenever you pass and whenever you water them. (I bet your kids would volunteer for the watering and the petting!) This rough treatment signals their roots to take a firmer hold so they'll survive better when they're moved to fend against the elements in the great outdoors.
That's it! Now just enjoy the growth. When the time comes to move your seedlings outdoors, be sure to harden them off first by gradually exposing them to the outside during moderate temperatures and partial shade, bringing them in at night. After a week or two of increasingly longer outdoor exposure, they're ready to make the transition outside full time.
Then you can store away your seedling supplies for next year and enjoy the outdoor garden you've grown from scratch!

1 All right, to be perfectly honest, it is too late for some plants in some climates; I meant to get this posted in…say…February or March. But! You can start some late summer/fall plants now, such as zucchini squash, and give things like herbs, cucumbers, and flowers a try, or you can file this information away for next year.↩
2 This guide from Portland Nursery is a wonderful resource for the Pacific Northwest, for instance, as are these gardening books and the Western Garden Book. Use those ideas to search for similar resources for your region, or ask at local nurseries for the master gardeners' favorite recommendations.↩
3 There is environmental concern that sphagnum peat moss use will deplete ancient peat bogs and harm their biodiversity. Coir is made from discarded coconut husks and is a more renewable resource.↩


 I'm Lauren Wayne, writer and natural parent. I embrace attached parenting with an emphasis toward green living.


4 comments:
Love this. Can you believe it's already time for this up here? I just planted some bulbs in my backyard today. I need to get the seeds going.... I am afriad I might have been a little too late for my beloved tomatoes, but I'm gonna try it anyway. My dad already started his tomatoes inside and he lives in Southern Oregon where it's colder longer...
It's not too late to start a LOT of different things from seed. Like, pretty much everything besides tomatoes, peppers, and eggplant, things I prefer to get as starts anyway, honestly. Off to plant some shelling beans! :-)
@Cassie: Might as well try! If all else fails, you can buy some starts. I've had tomato harvests through Thanksgiving if the weather continues mild, so we'll cross our fingers. :)
@Inder-ific: Oh, good! I've pared down my garden ambitions this year, what with the baby due this summer, so I'm not starting as many seedlings as usual and couldn't quite remember when all of the varieties get started (and have no idea about different gardening zones). I started in February and am down to just one more to start indoors and several to direct seed outdoors. I'm actually feeling quite pleased that I'm this "together." ;) Enjoy your beans!
Yeah, you sound very together! With all the rain we've had this year, I'm running way behind. But different rules apply in my coastal fog belt, where the best weather of the year comes in April and September. Nonetheless, I know that in many parts of the country, you can't plant anything until Memorial Day or later, so those folks still have time to start pretty much anything!
Post a Comment